Workflow – it’s a scary word, right? It comes up more and more every day in conversations; so much so that Gartner, a leading technology analytics firm, has transitioned the Enterprise File Sync and Share (EFSS) marketplace into a new category: Content Collaboration Platform (CCP).
Citrix ShareFile has been consistent in our execution within said marketplaces. In the three years that Gartner produced the Magic Quadrant for EFSS, ShareFile was named a leader. This year, as the marketplace shifted to the CCP, ShareFile was, again, named a leader – for the fourth time in a row!!!
Why? There are a number of reasons explained in the Gartner report(s) – but, today, we are going to focus on one: Workflow.
The purpose of ShareFile’s workflow engine is to simplify the building of workflows to a manner by which an Average Joe business user can create flows using if/then type statements and filters in order to automate mundane tasks in their day-to-day.
Let’s start by breaking down workflow: what is it? A few months ago, one of our sales directors broke down workflow for our team in a way that makes the conversation flow smoothly. Here’s how he explained it to us: “There are two types of widely-used workflows: document-centric and process-centric.”
Document-centric flows range from simple document sharing, signing and/or countersigning documents, and collaborating/collecting feedback on documents. Process-centric workflows are exactly as they sound — they’re processes that enable business users to complete their daily jobs/tasks. For example, process flows can include onboarding a new employee, releasing medical records to a new provider or a patient, conducting safety checks on machinery with flags that alert proper personnel based on data input.
Everybody has a workflow – a pattern or sequence of events that gets their job done. Maybe yours is emailing everything; maybe you take notes on a piece of paper, input the data into an application and go from there within that app or another; maybe you print a document, send it in the mail and wait for a client to sign it and return it to you for filing. Whatever your flow may be, ShareFile can most likely help.
Sure, there are other options out there like SharePoint and other monstrous solutions for building out workflows (SAP, anyone?), but those require a lot of attention and, often times, require a higher-level knowledge of the inner workings of the solution to actually build a flow.
Like I said before, ‘workflow’ is a scary word for some; however, ShareFile has taken this scary word and made it as easy as 1, 2, 3!!
Enter Workflow
Last year, ShareFile Platinum was released as a solution to workflow – with the incorporation of RightSignature, Globiflow and Podio into the ShareFile platform, we created a no-code/low-code workflow product. With a Platinum license, customers are able to build a flow around a Podio app to enable their business users to enhance their jobs with automation. These flows could be started with different triggers, including the completion of a web-form in Podio, that would result in actions, based on the trigger and filters set on said trigger.
Since its release, ShareFile Platinum has driven home greater value to many of our customers who are looking to use automation to cut mundane task times out of their days. In a business case, less time spent doing manual data entry or task delegation would result in a higher productivity level amongst staff.
Earlier this year (2017), ShareFile Custom Workflows was again enhanced for the Platinum product solution by incorporating the inner workings of another Citrix application, formerly known as XenMobile’s Secure Forms. The concept behind this app was to help enable our customers to use a forms-based application for triggering a workflow automatically – no more manual data entry followed by more data entry and manual delegations of tasks. This automation helps to ensure processes are completed and that they don’t ‘fall by the wayside’ or ‘through the cracks’, as many of us (myself included) are guilty of letting happen.
As mentioned, mobile flows are forms-based, meaning they can be used for most anything that can be mobilized into a digital form. As we enter the age of Digital Transformation, everyone is going green – if your company is still using paper and pen for data collection, reach out to your Citrix rep to find out more about this solution; you won’t be sorry that you did.
Now, this isn’t to say the old workflows weren’t doing the trick; no, this is a further enhancement of said flows: mobilizing form entry into an application that can be used online or offline and saved for later – no more scrambling for a connection to get a web-form loaded!
ShareFile Custom Workflows introduced an application for business users to access forms built in a web application from their mobile device. They can select a form, enter the data in said form and watch as it kicks off another step in the process.
Let’s go through how we can build one:
First things first, there are some requirements for custom workflows:
- A ShareFile Enterprise Platinum account
- An employee license with the user permission to “Create and deploy workflow actions and triggers”
- The custom workflows feature to be enabled on your account
- Contact your Citrix rep for assistance
Now that that is out of the way, we’ll start by navigating to the custom workflows window:

On first launch, you’ll be directed to the Custom Workflows screen, which will look like this, but most likely blank!
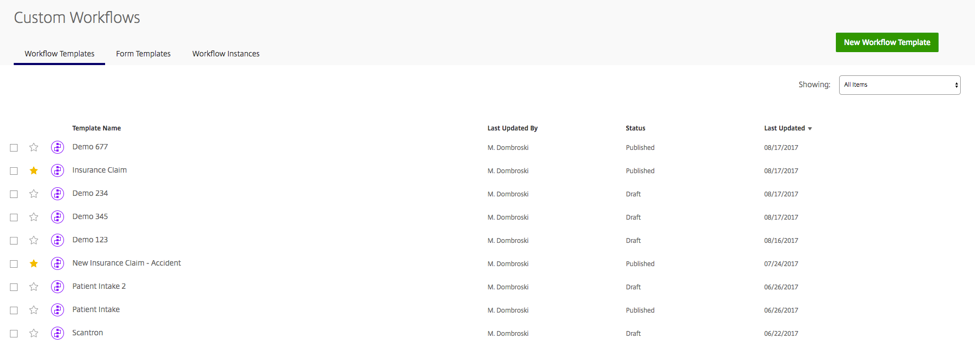
Next, select “New Workflow Template” in the upper right hand corner. Alternatively, you can switch to the “Form Templates” tab and create your form first, but we’ll create on in this example as we go through building out our flow.
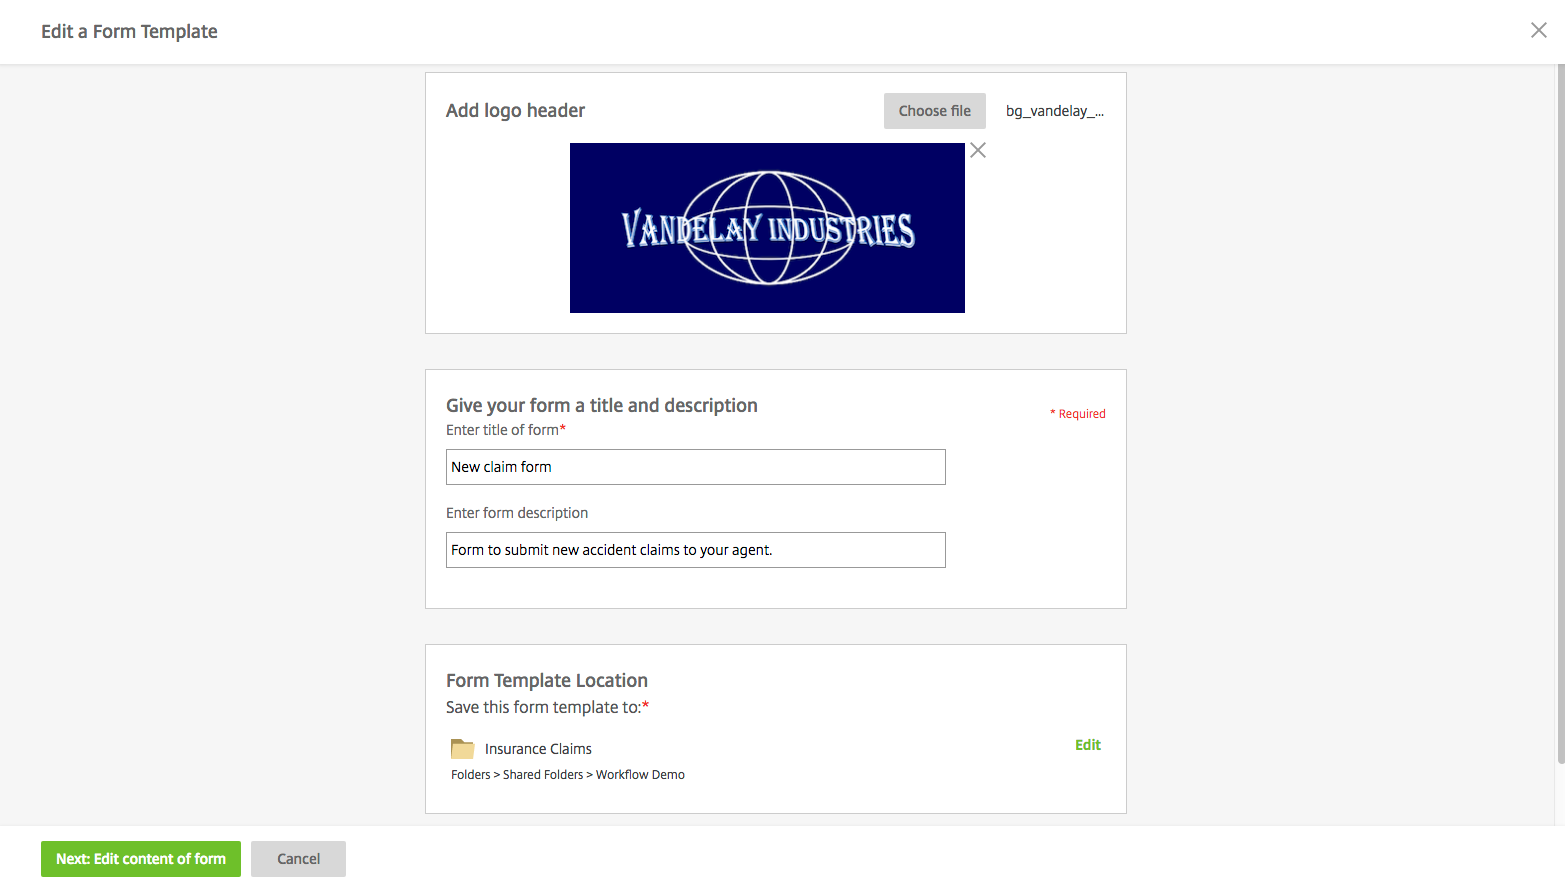
Here, we will give the form a title and description – in this example, I’ve added a logo and used this form for an auto insurance agent to submit a claim on behalf of a customer. We’ll also specify where our workflow template saves to by selecting (or creating) a folder within ShareFile.
Once satisfied, select “Next: Edit content of form” in the bottom left. You’ll be brought to the next page for adding workflow steps and land on “Step 1: Trigger”. Here, we will name our trigger and select from the drop-down list – in this example, we’ll use the option for “A form is completed” and name it “Form Completion” (creative, I know!).
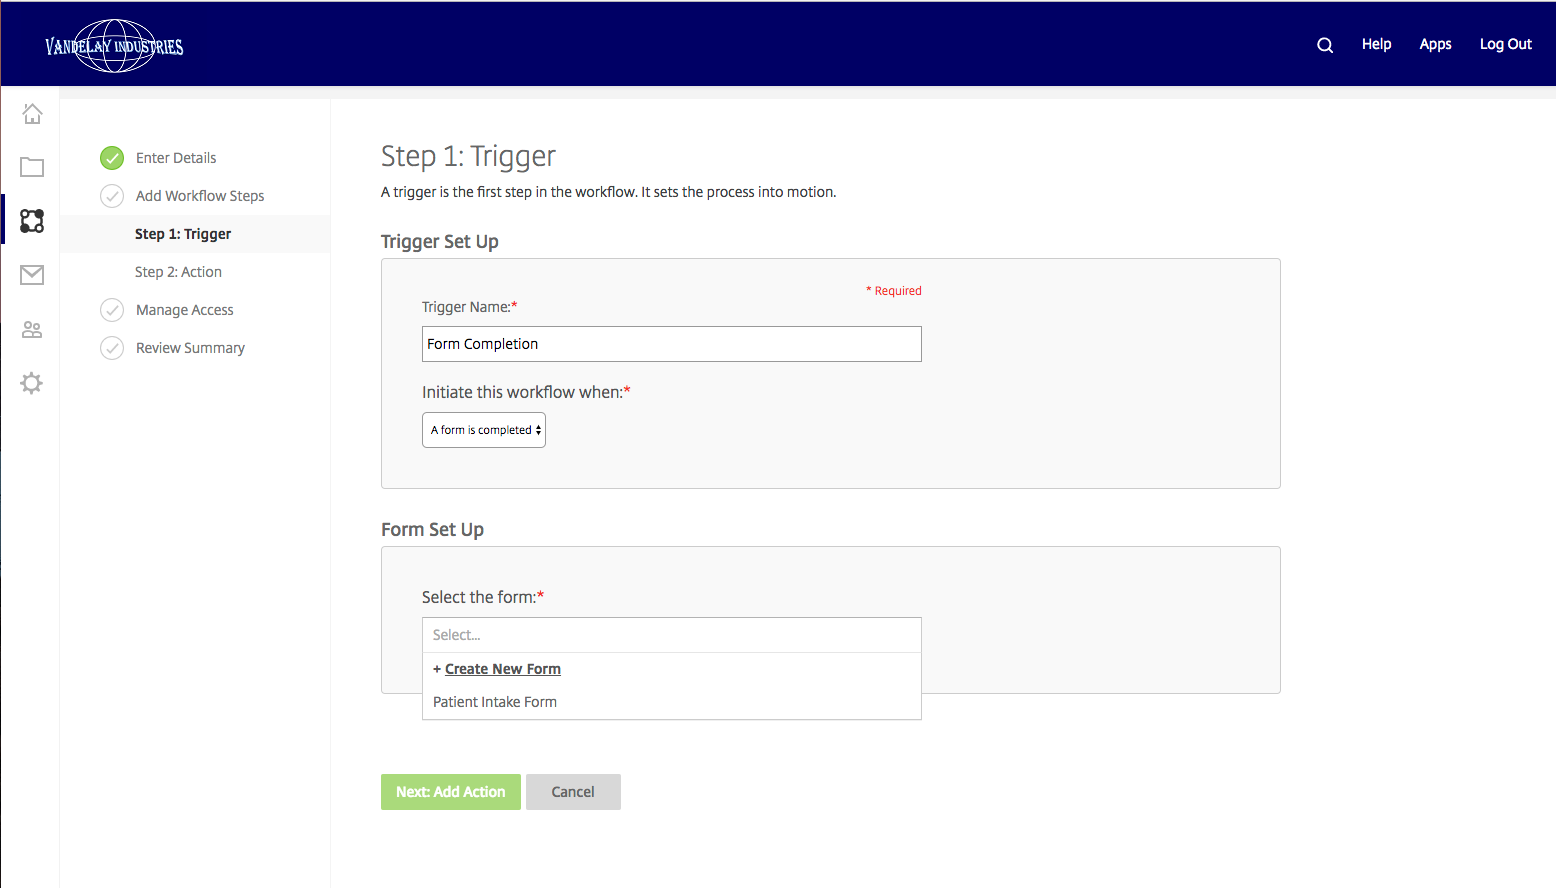
On the bottom of this screen, we’ll have the option for “Form Set Up” – as mentioned above, you can utilize a previously created form from the “Form Templates” tab, but in this example, we will select the “+ Create New Form” option.
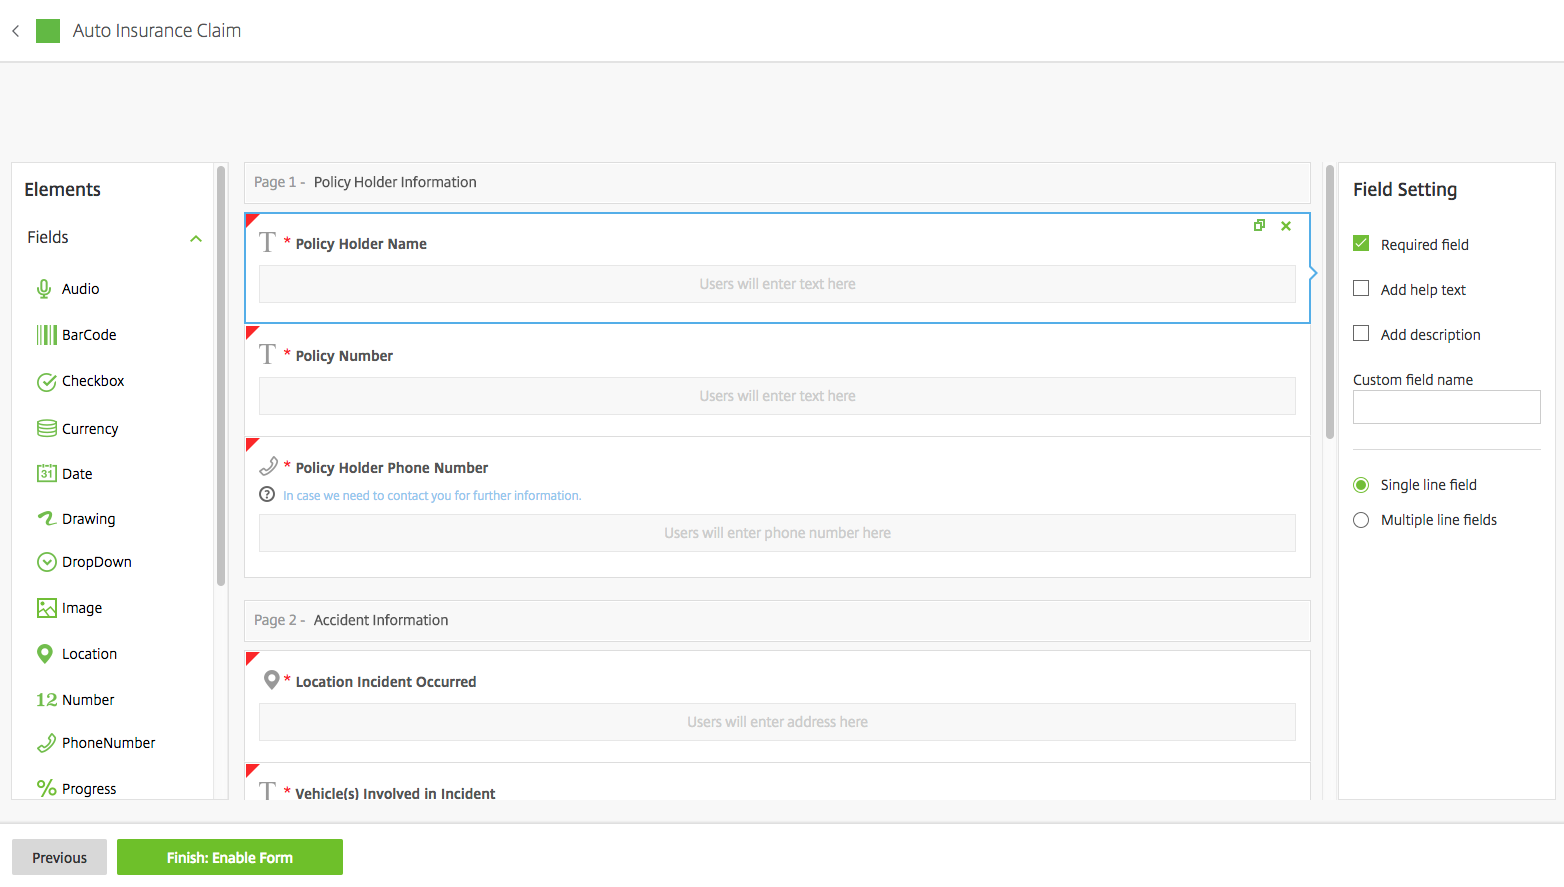
This page is our dynamic form builder. Again, there’s no need for coding here, users can drag and drop fields into the form, add page breaks, help text or require specific fields to enable submissions of forms. Input can range from text to numbers to signatures and locations, etc. Sorry to be a broken record, but we are still using our auto insurance claim for our example, requesting policy holder information along with information about the accident and supporting documents.
Once the form is completed, we can go ahead and select “Finish: Enable Form” to publish the form for use in our workflows and we should be redirected back to the Workflow Trigger page with our newly created form in our selection box at the bottom. From here, we can select “Next: Add Action” and continue.
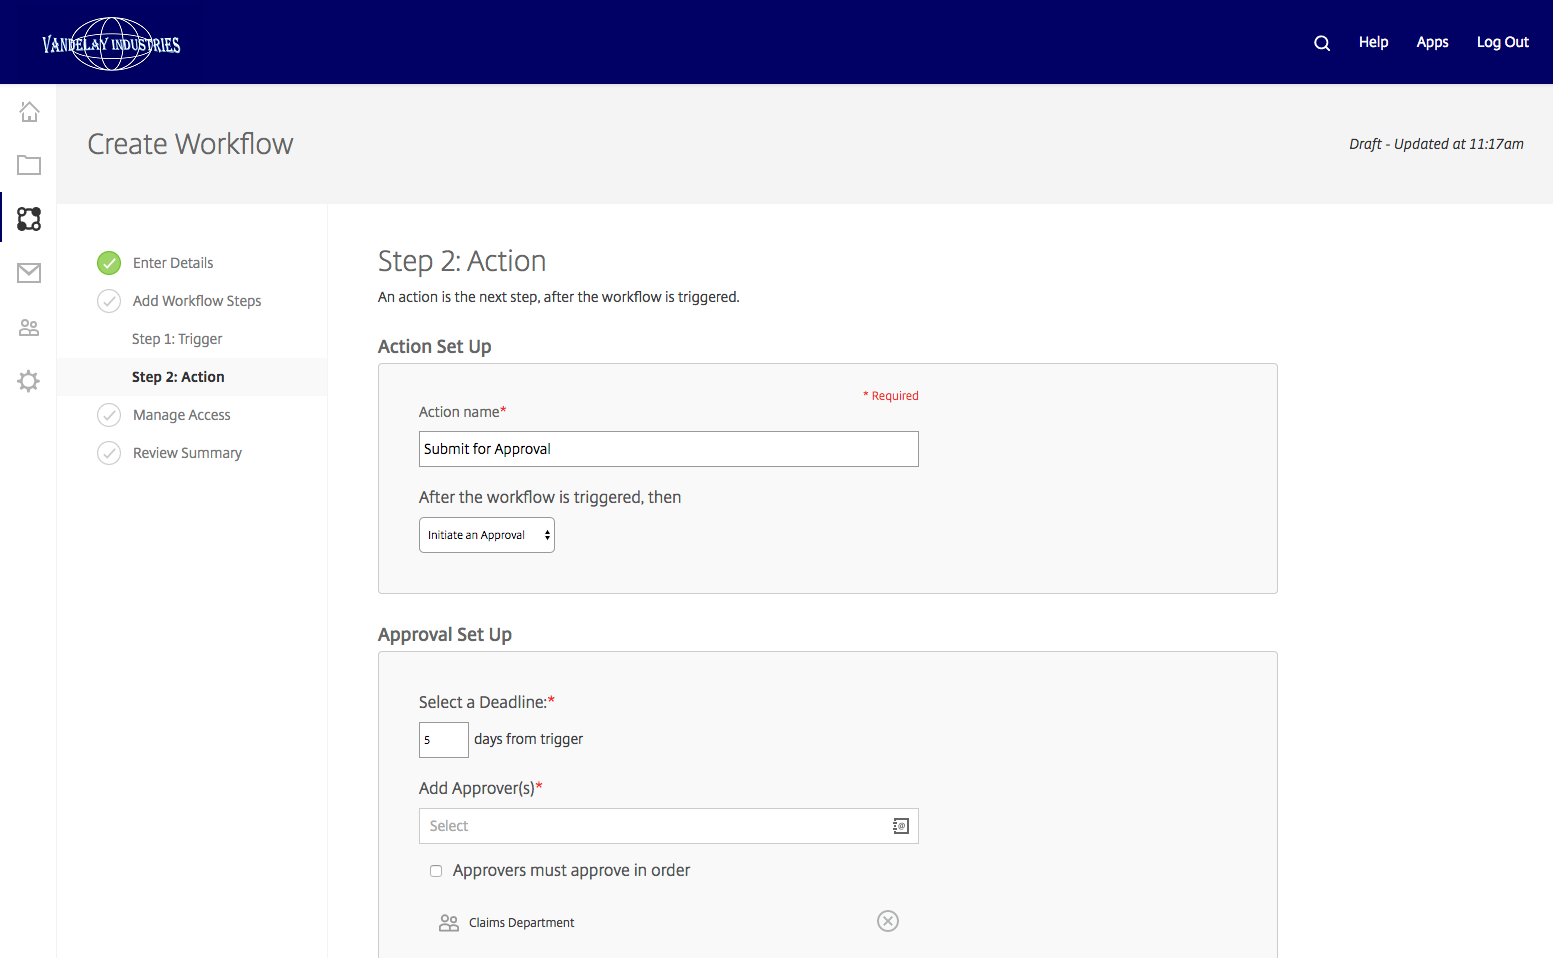
Next, you will arrive at an action page where you can name your action (hopefully more creative than I have here) and choose the action to occur once a workflow is triggered. In this example, we are using an approval as our first action and adding a second (optional) action to occur after.
Again, we start by naming the action and selecting from the dropdown – here, we use “Initiate an Approval”, which drops down a dynamic window to configure our approval. You are able to select a deadline for the approval process, which we have set to 5 days from the trigger date in this example, and add the approvers and any carbon copies that are or will be necessary. In this example, we add our claims department group which allows any member of said group to approve the document and take ownership of this claim.
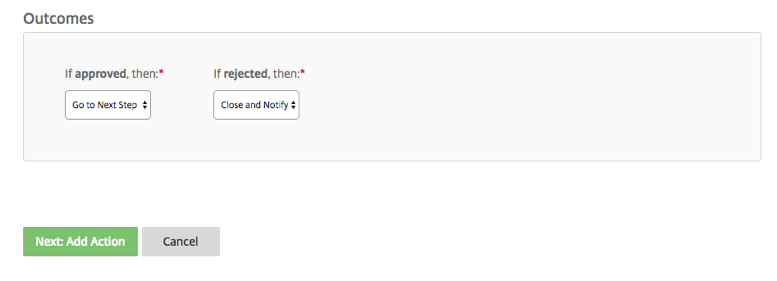
After configuring the approval, while still on the same page (scroll down), you can set your Outcomes – if approved, then x; if rejected, then y. Here, if we obtain approval, we go to the next (optional) step mentioned above; if rejected, we close the workflow out and notify the user who submitted the form.
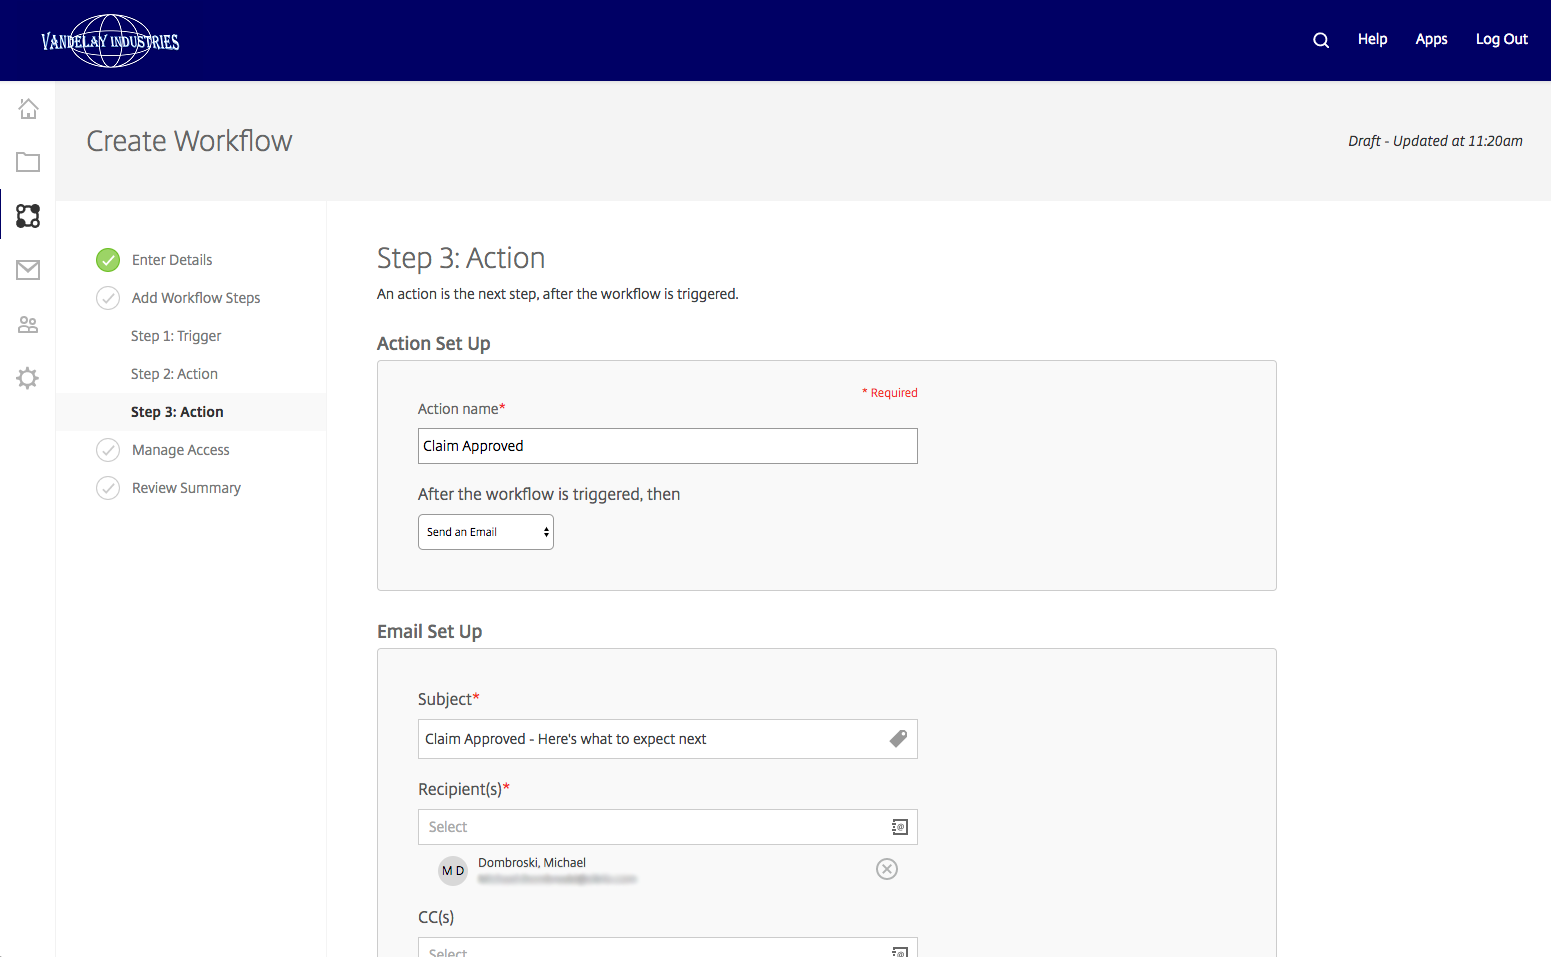
Once Outcomes are set, we can move on to the next action window (Action # 2, again, optional). In this action, we are emailing our rep (myself in this example) to let them know that the claim was approved! Start by naming your action and selecting “send an email from the list of actions and a dynamic window will appear to set up your email.
The email template can utilize tags from the input, including the user who input the data, the time that it was approved, who approved it and much, much more! Here is where we will customize our subject, recipient and message, including which items to attach to the email (photos submitted, audio files, approved document, video or form data – all delivered via ShareFile, of course!). At the bottom of the screen, you can customize your message to the recipient and utilize the same tags mentioned above within the body of the message!
Once we have our email configured the way we’d like, we can continue on to the next screen by clicking “Next: Manage Access”.
On this page, we’ll select what users have access to our form data – who can initiate and/or manage workflows and who can view reports and/or manage templates. These user permissions can be set at the individual or group level using Distribution Groups.
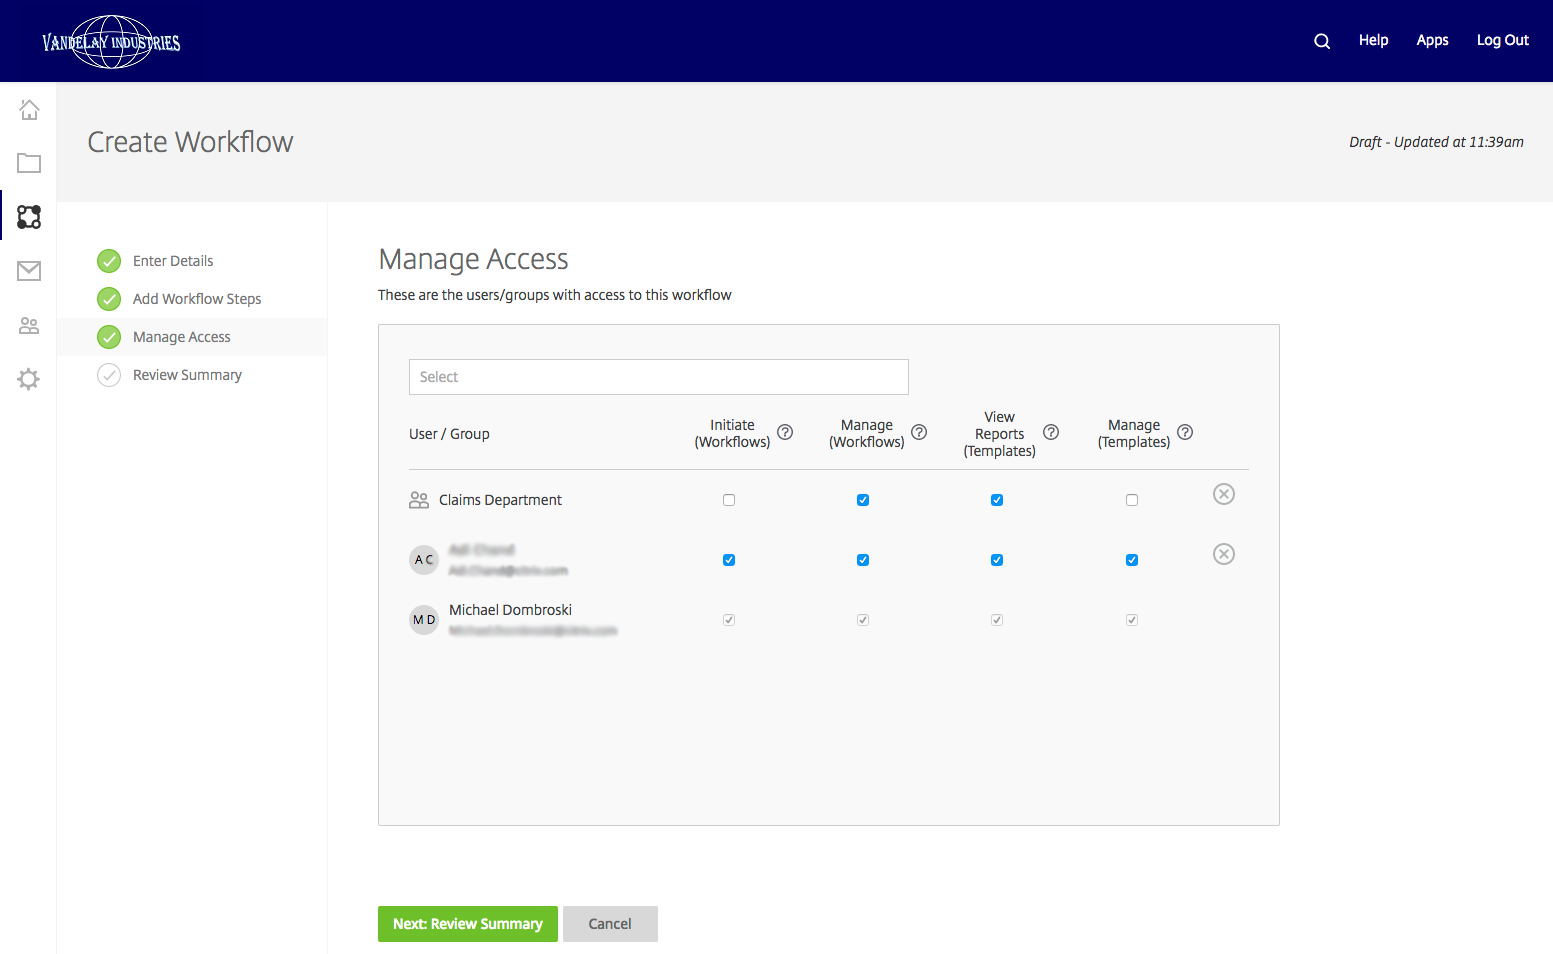
Once ready, you’ll click “Next: Review Summary” which will launch you into a summary page with all of the information we just entered laid out in an easy-to-digest format.
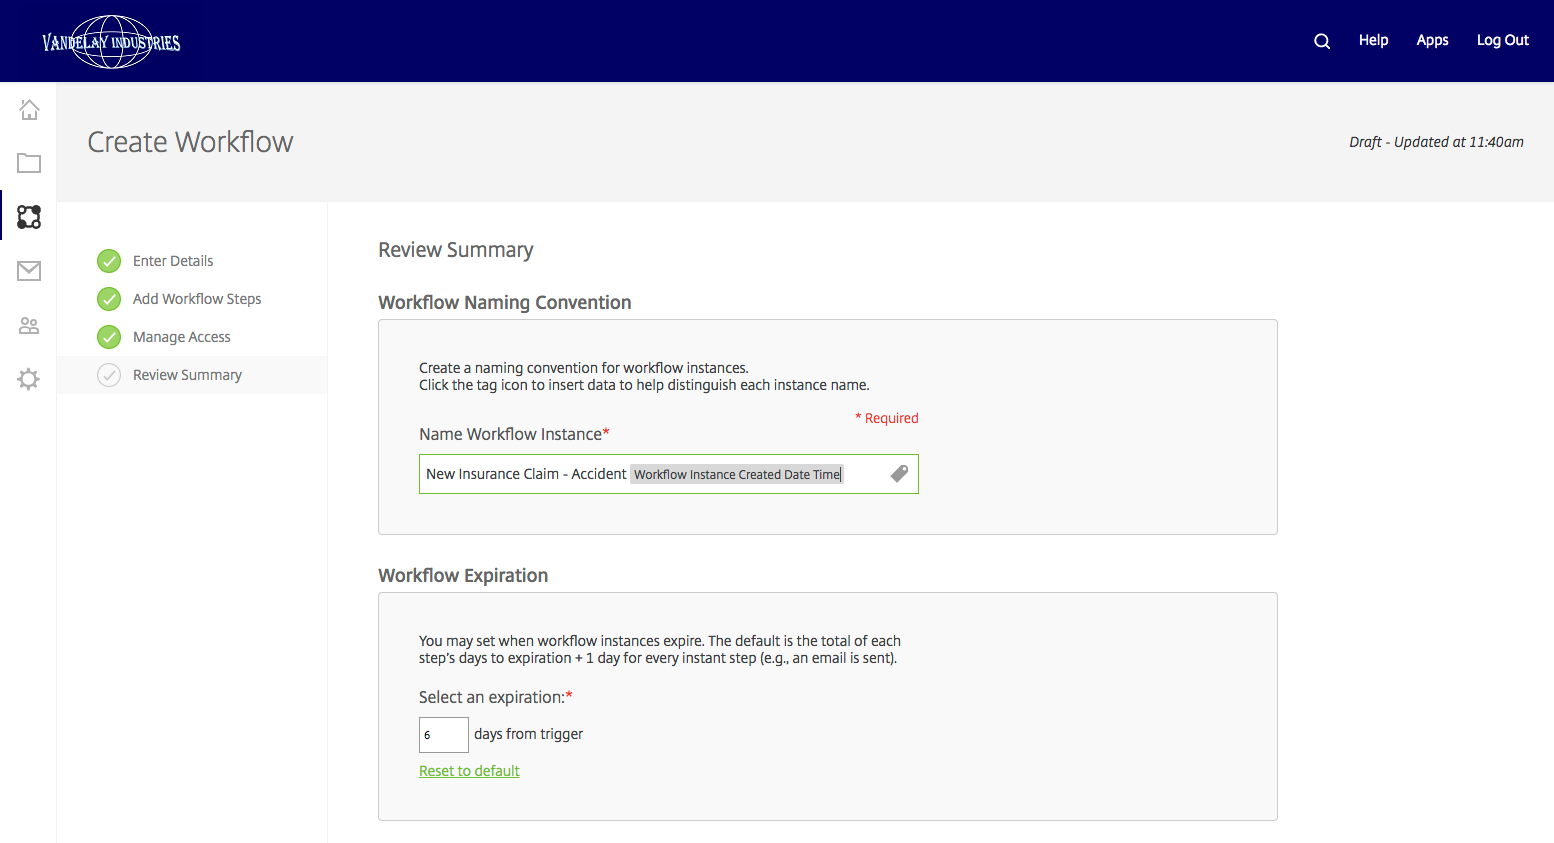
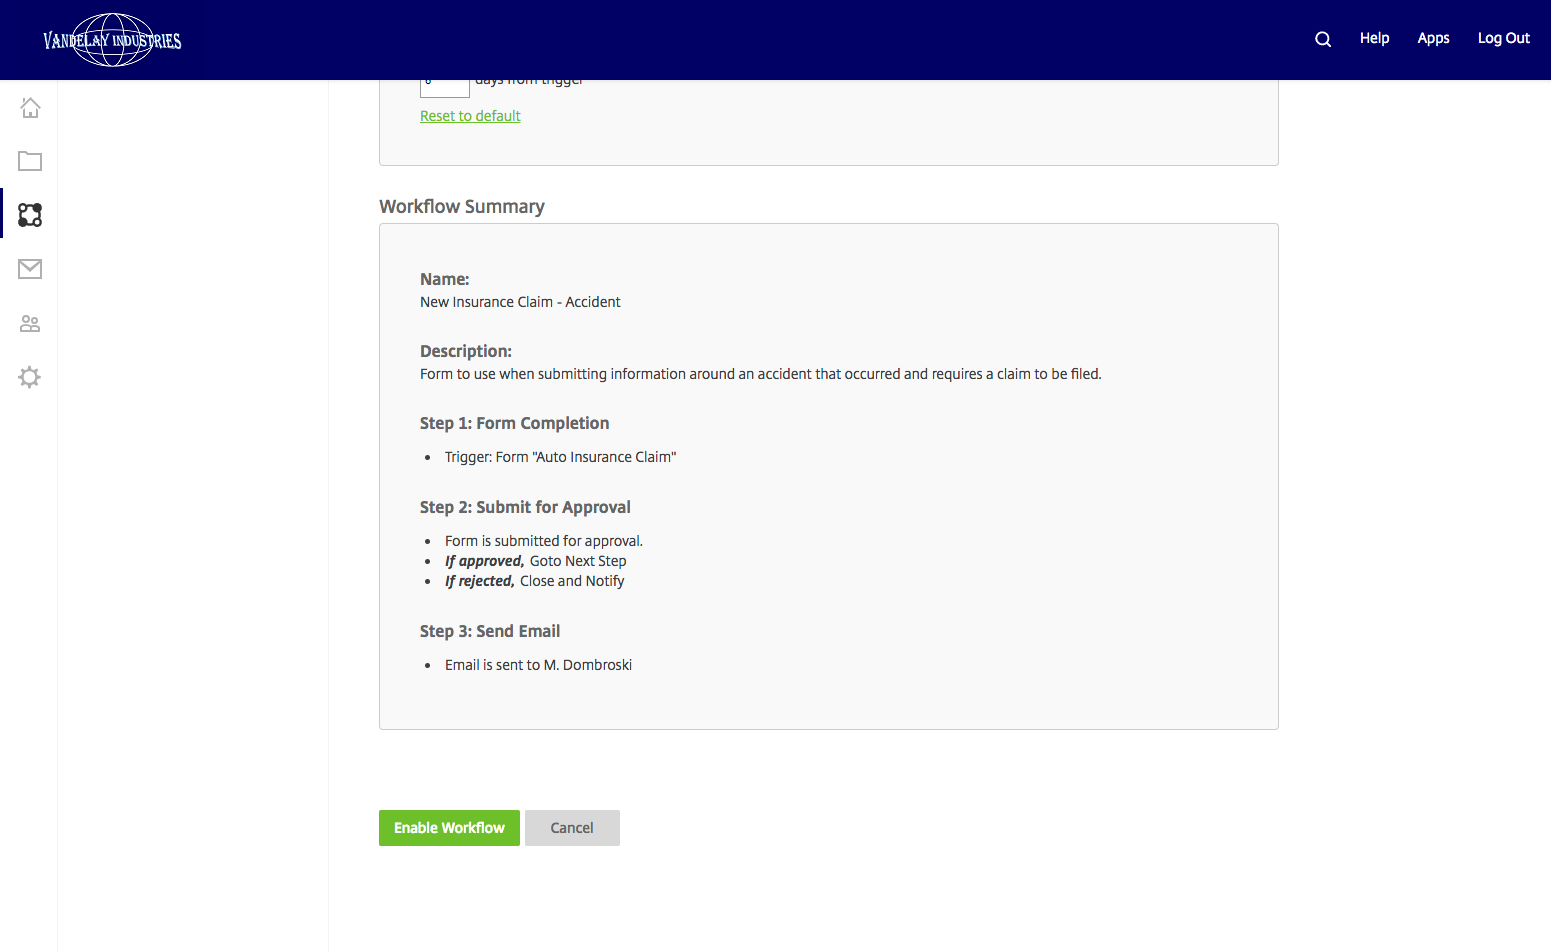
That’s it! You just built your first workflow!!
But how do we submit them?!
Today, custom workflows are initiated by a mobile forms application called “Citrix ShareFile Workflows” that is available for iOS and Android devices via the respective app stores. Look for this icon:
On your device, download the app and launch it – on first launch, you’ll be prompted for login. Log into and link your ShareFile account to said application. You should see the form(s) that were created in your web application on your device now.

Select the form that you would like to initiate a flow with. And swipe left to get started!


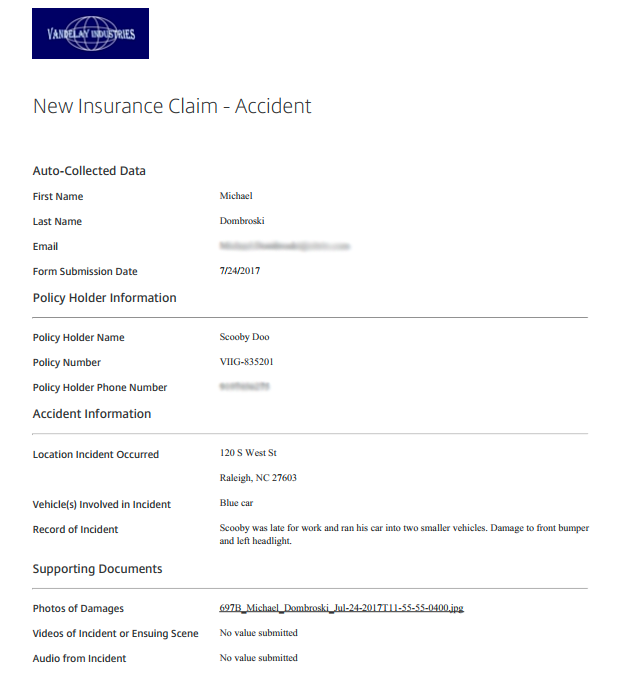
Once a form is completed and submitted by an end-user, the workflow will be triggered, per the configuration above! From this form, the following output is presented in an approval format to my claims department:
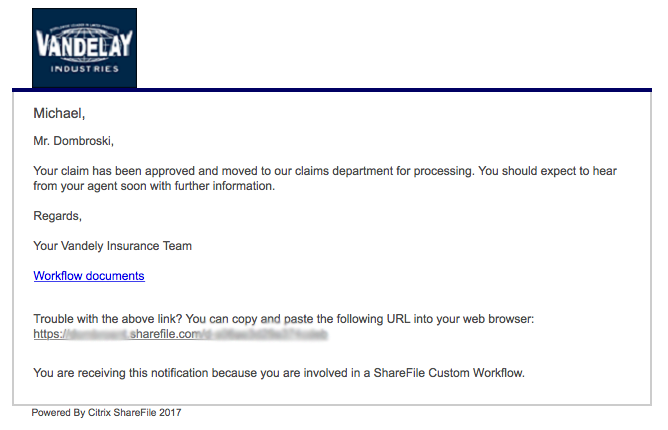
In our example, if the document is approved, the recipient receives and email that looks like this:
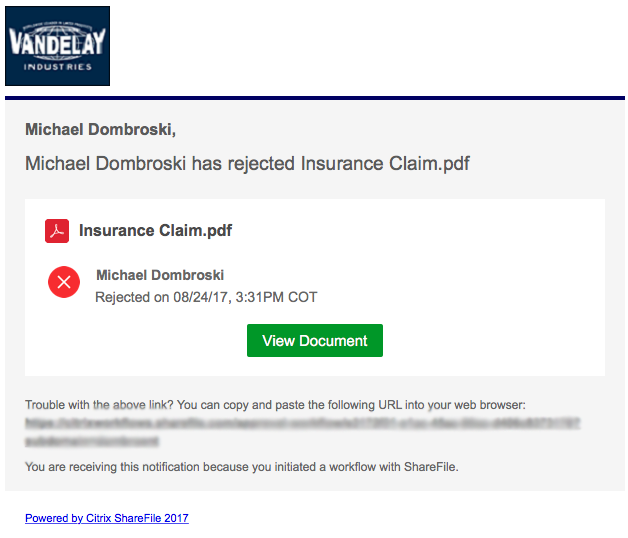
If rejected, the user receives the following: