Have you ever looked into the XenApp / XenDesktop Monitoring Database by means of SQL Server Management Studio or a simple SQL query? If not you might be surprised how much data is stored within this DB, which is not yet exposed in Director.
So in case you’re looking for historical reports or data on specific trends, which you cannot find in the Director Web UI you could simply create a custom report.
Although this sounds complex and like you would need to become SQL scripting guru, it is actually fairly simple and can be achieved by means on Excel.
So getting more insight into you XenApp / XenDesktop environment is just a matter of getting the data from the DB and convert it into a human readable format. Within this blog post I’d like to guide you trough setting up an Excel Workbook that does exactly this.
In Order to Illustrate the Workflow
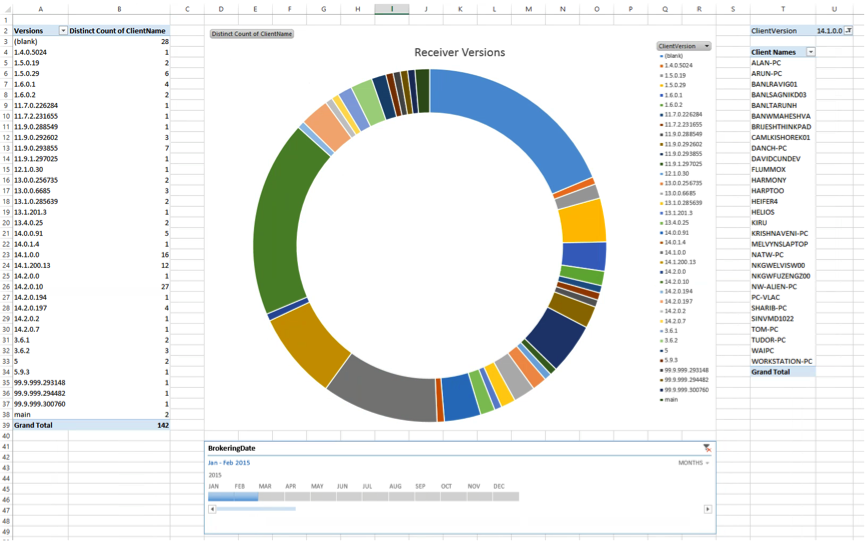
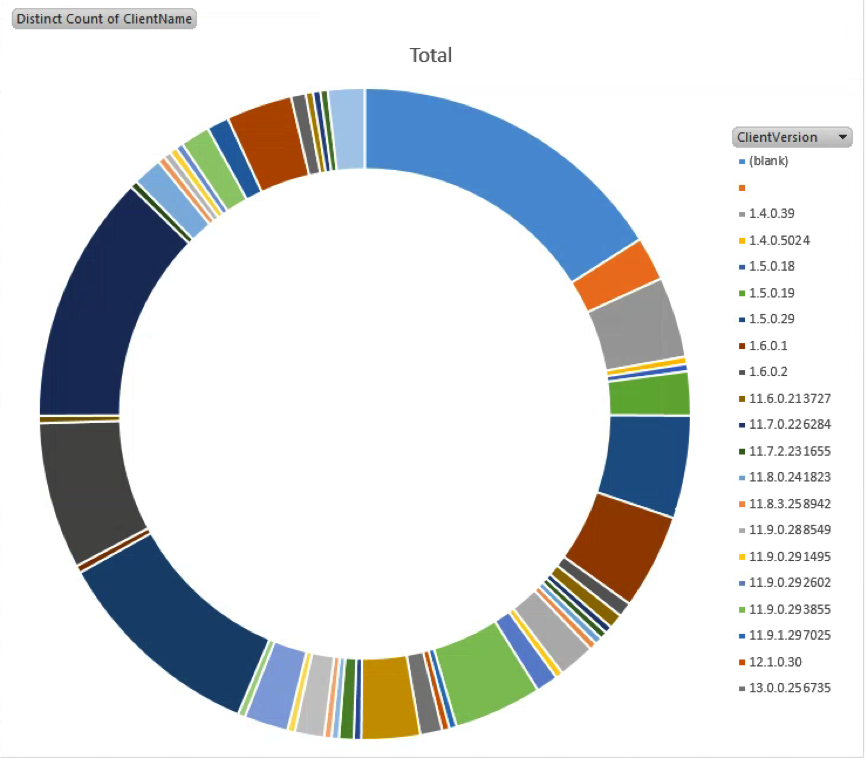
We’ll create a report that outlines the versions of Receiver used to connect to the site. So when following the steps outlined below, you should end up with something like this:
Please keep in mind that accessing the Monitoring DB will cause Excel to read a lot of data from it. This means that you’ll see Excel consume significant CPU and RAM resources and you might see some overhead on the broker as well as on the SQL server. So before using this within your production site, give it a shot in your test environment to understand its impact.
1. Open an empty Excel Workbook
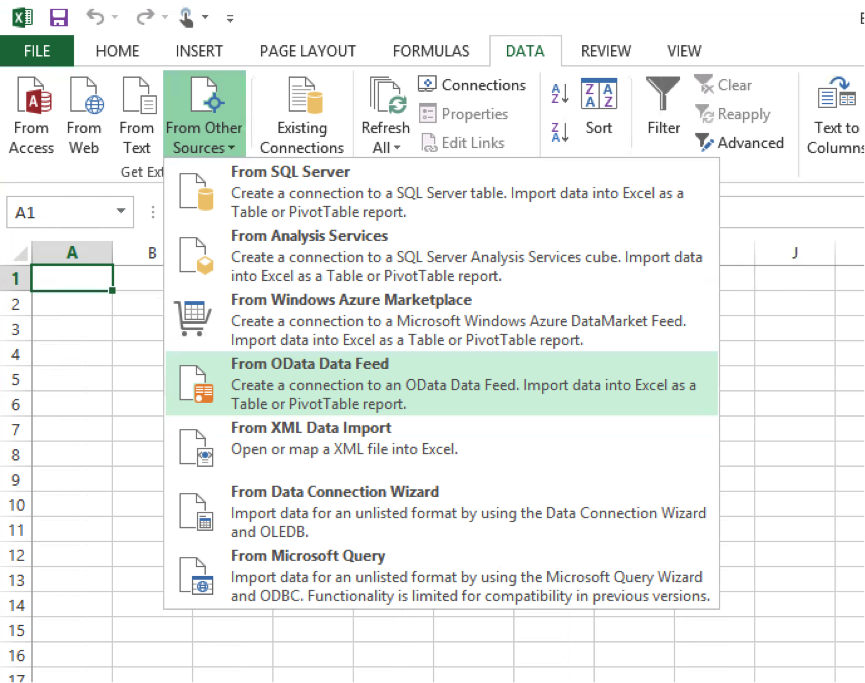
2. Select Data –> From Other Sources –> From OData Data Feed
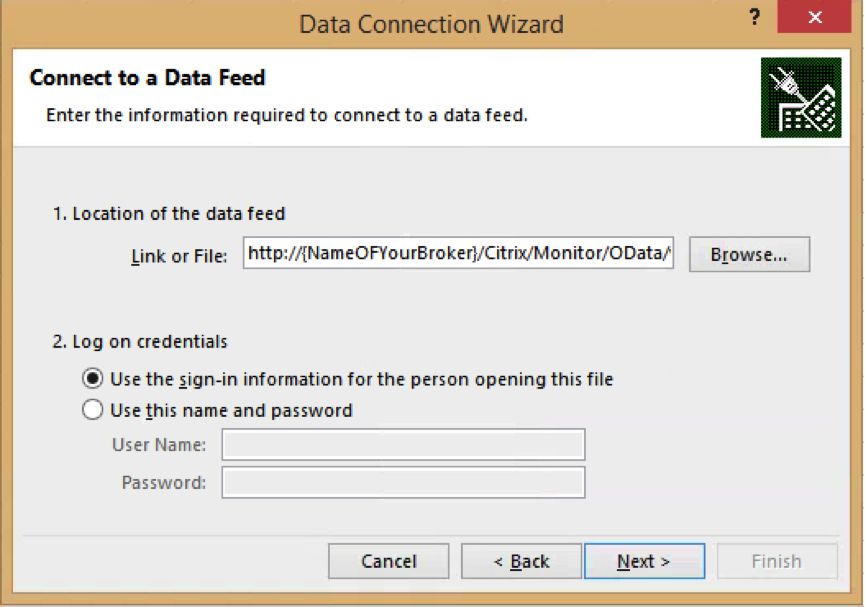
3. Connect Excel to your Monitoring DB by entering the following Data API URI http://{NameOFYourBroker}/Citrix/Monitor/OData/v2/Data in the “Link or File” field (please use …/OData/V1/Data for 7.5 and earlier), specify a user account with Admin permissions in the XA/XD site and click Next:
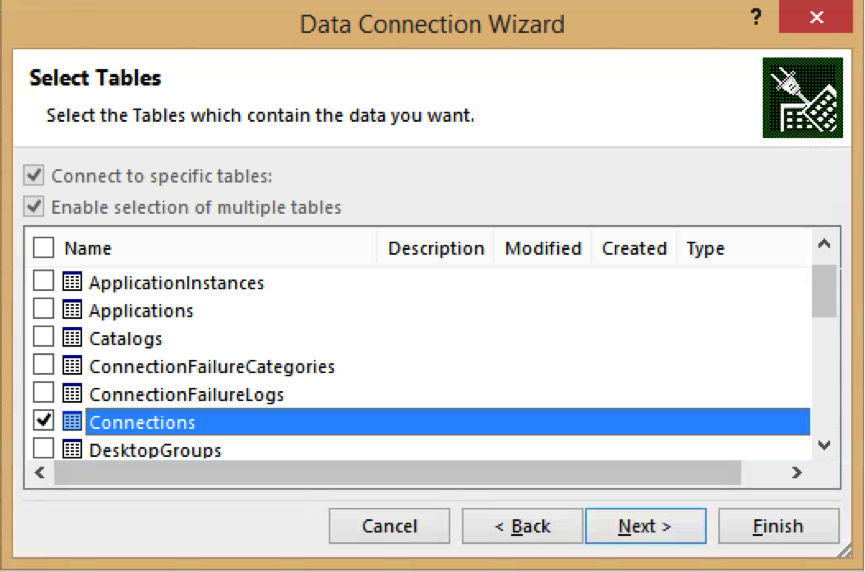
4. Select the Connections table and click Next:
5. Give it a name and click Finish:

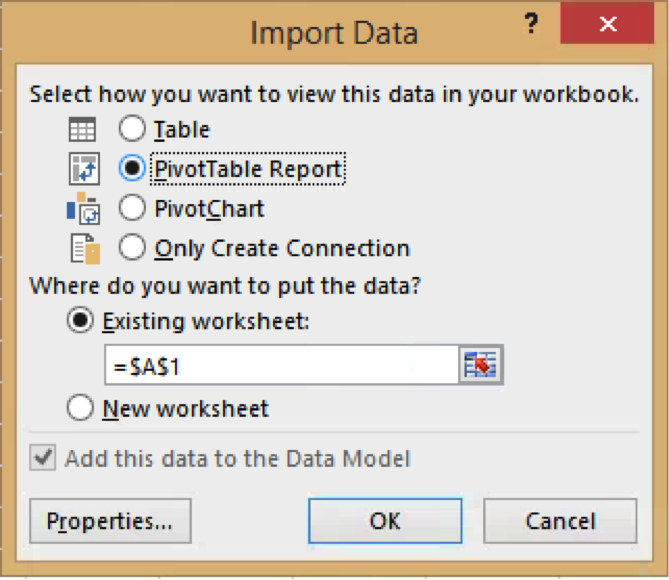
6. Select PivotTable Report and click OK. (If you select Table instead, you’ll get all content of the Connection table imported into the Excel Sheet. This can be nice for getting an idea about what is stored in the monitoring database.)
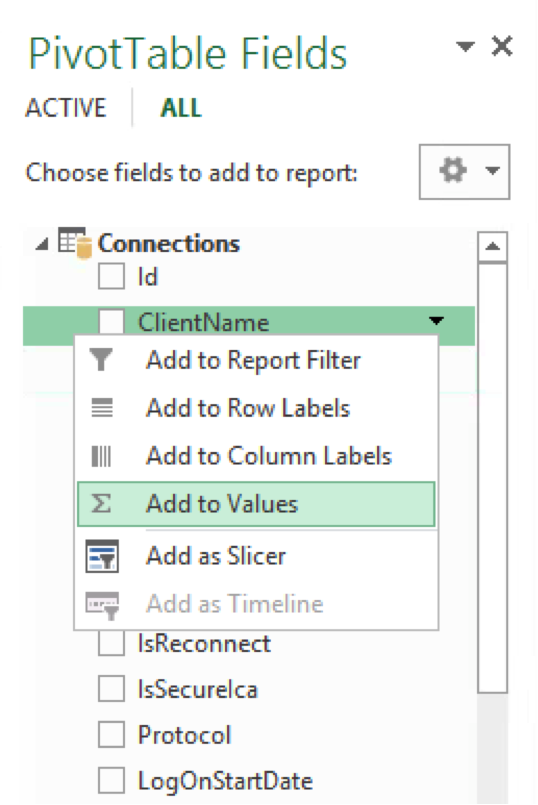
7. On the right hand side of the Excel window, within the PivotTable Fields menu, right-click on ClientVersion and select Add to Row Lables:(You should now see a list of all Receiver versions in Column A)
8. Right-Click ClientName and select Add to Values;(Now Column B should be filled with a lot of numbers. This number indicates how often a HDX connection has been established by means of a specific version of Citrix Receiver. But it’s important to understand that every connection is counted. So if a user connects three times we’ll count three sessions).
9. In order to clean up the list and make sure every client is just counted once, click Count of ClientName within the Values field and select Value Field Settings: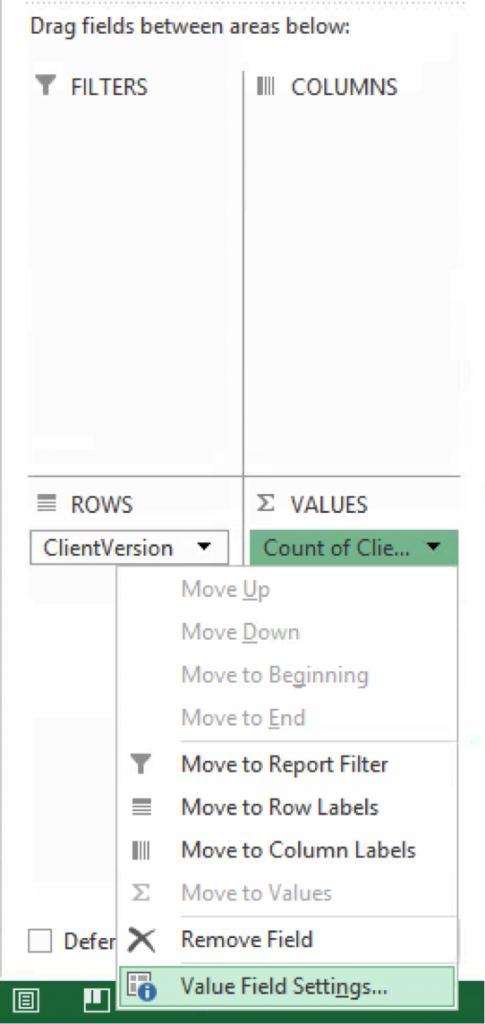
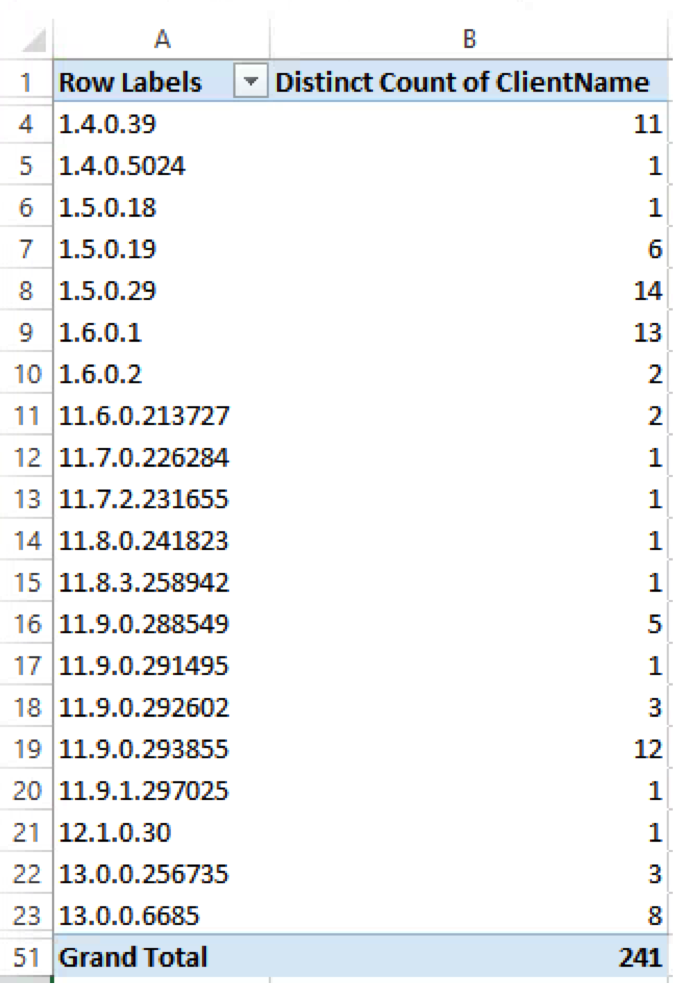
10. Scroll to the bottom of the list, select Distinct Count and click OK:

11. You should see a list similar to this one:
12. In order to see which clients have connected by means of a particular version, select the version, click on the little magnifier icon, select ClientName and click on Drill To ClientName:
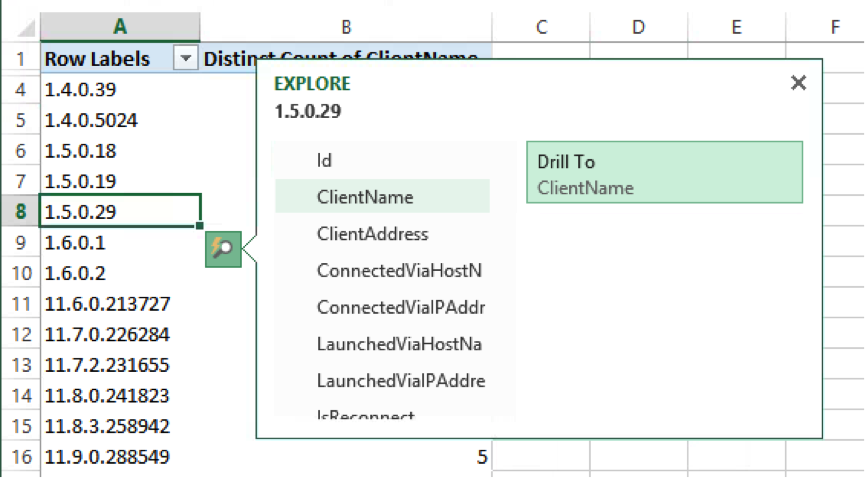
13. Now you should see a list of the respective clients.
Just getting this list with relatively few clicks (I know that should be accessible right from within Director, but that’s another discussion) is already pretty cool. But there are a few more things we can do in order to improve it.
Timeline
So far we use all data available within the Monitoring database. In case you’re a Platinum customer, this means we’re looking at data of the last 365 days. Usually a lot of things happen in one year, so we might want to limit the timeframe we’re looking at. This is very simple to achieve.
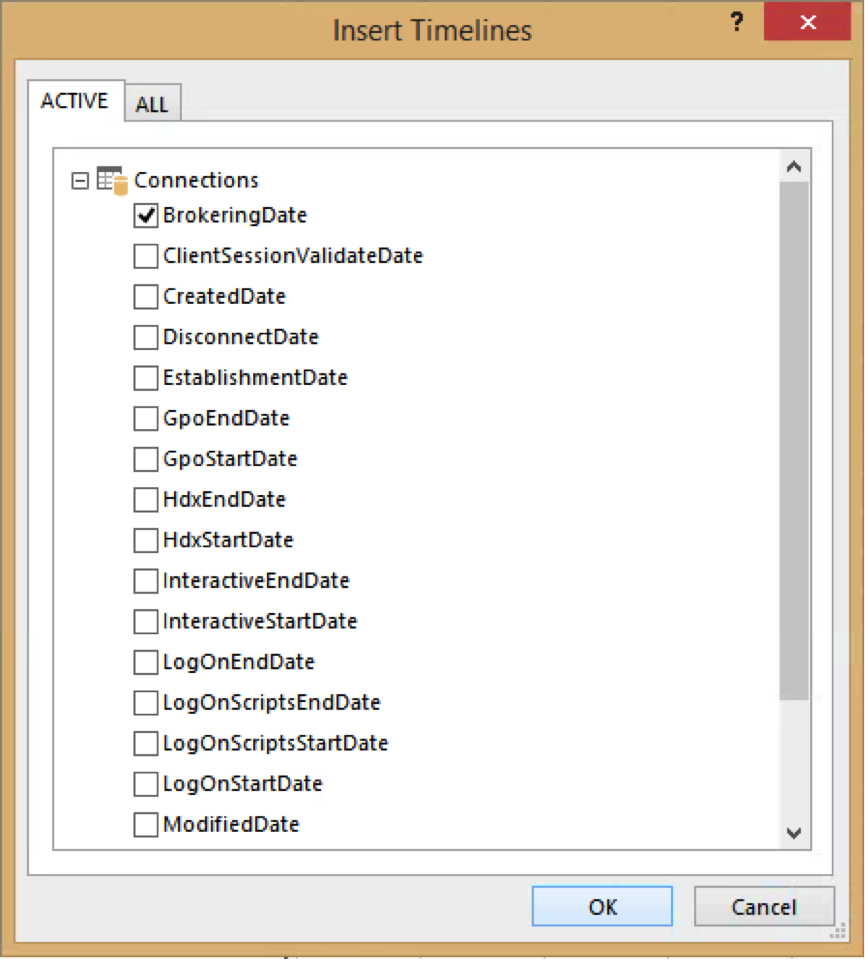
- Click on the table we just have created, select Analyze from within the PivotTable Tools and click on Insert Timeline:

- Select BrokeringDate and click OK:
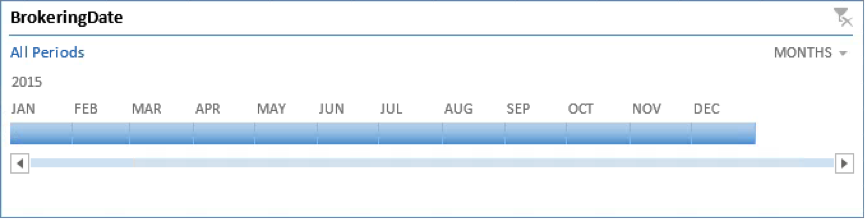
- Now you should see a selection window similar to this:Just select the months or periods of time you want to look at and the list of Receiver versions should change in real-time.
PivotChart
In order to make the list of Receiver versions a bit easier to read, we can add a PivotChart.
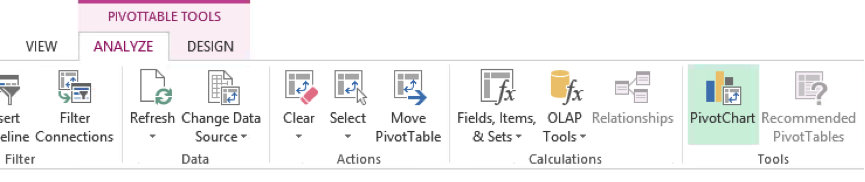
- Select Analyze from within the PivotTable Tools and click on PivotChart:
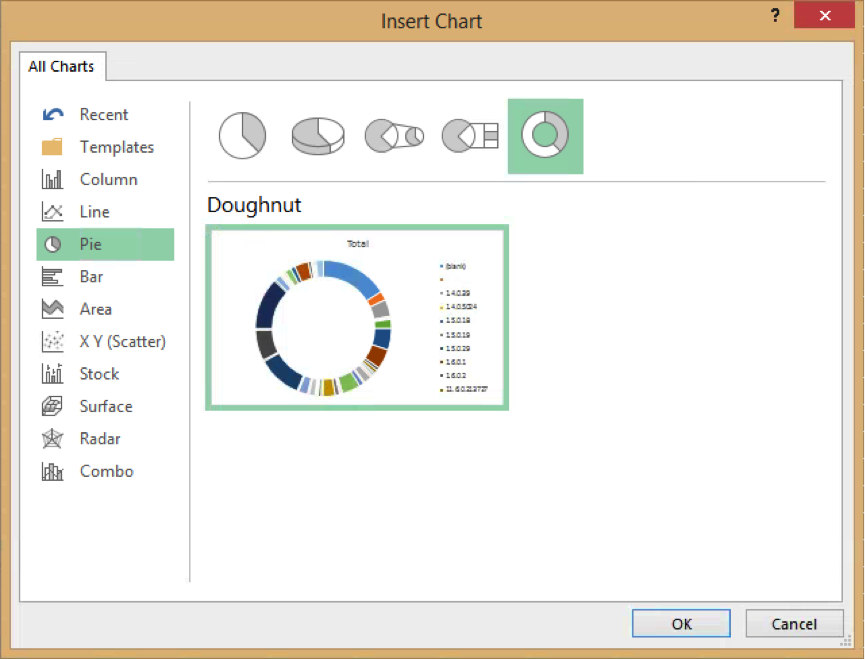
- Select the chart you prefer (I personally prefer the Doughnut chart) and click OK:
- No you should see something like this:
Receiver Version Drop-Down
Using the PivotTable drill-down feature is ok, but there is an even simpler way to access the list of clients with a specific version of Receiver. This requires us to create another PivotTable, which can leverage the same data connection and can be placed on the same Excel sheet. In order to keep this blog as short as possible I’ll not add screenshot for steps we already covered.
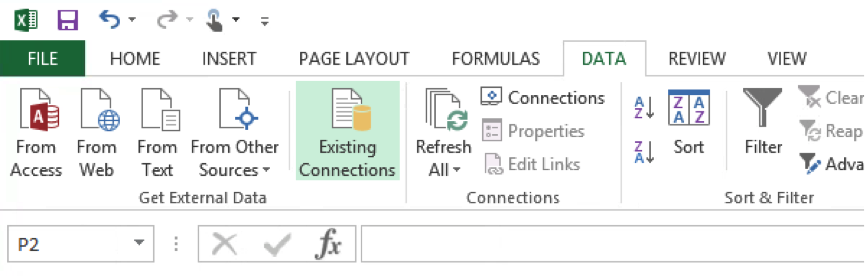
- Select Data and click on Existing Connections:
- Select the OData connection we created earlier and click OK.
- Select PivotTable Report and click OK.
- Right-Click on ClientName and select Add to Row Labels.
- Right-Click on ClientVersion and select Add to Report Filter.
Now you should see something like this:
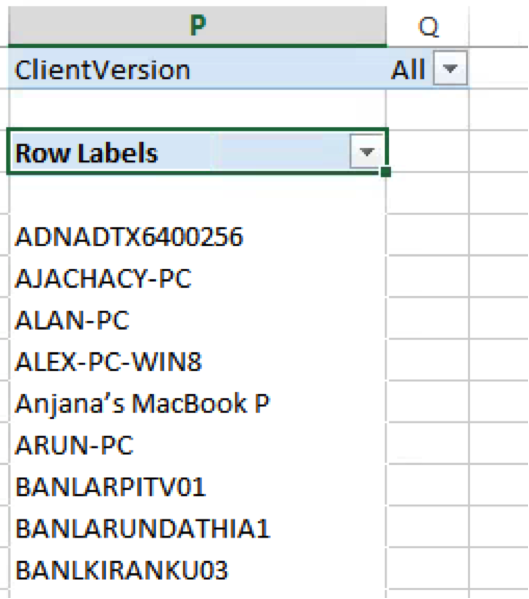
- In order to filter for a specific version of Receiver, click on the drop-down field labeled with All and select the version you’re looking for.
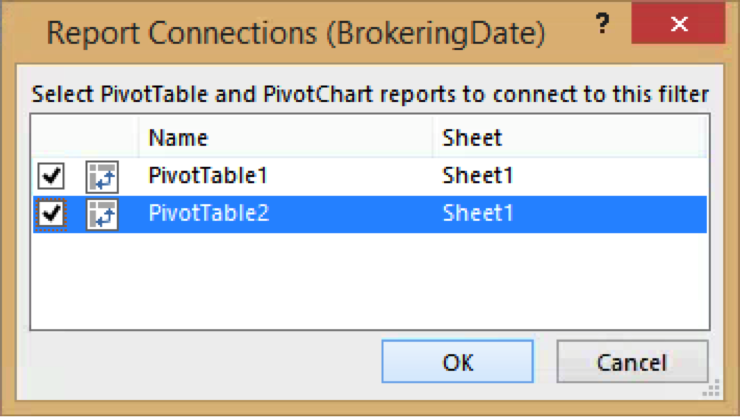
- In case you’d like to add the timeline feature to this PivotTable as well, right-click the timeline and select Report Connections.

- Select both PivotTables and click OK:
That’s it. Now you should have a dashboard that provides you with a detailed reporting of the Receiver versions and an easy way to find out which clients use a particular version of Receiver.
Within this blog we’ve just used data from a single table of the Monitoring DB, but there is much more data at our disposal. So if you think there are other reports badly needed, please feel free to leave a comment below and I’ll post some How-Tos as time permits.
Some Reference Material:
– eDocs – Monitor Service OData API
– eDocs – Monitoring Service API
– Blog – XenDesktop 7 Monitor Service – What Data is Available?
– Blog – Creating Director Custom reports for Monitoring XenDesktop with LinqPad
-Thomas
Follow me on Twitter @tberger80.