
In part 1 of this series, we looked at how to deploy a custom Windows Start Menu Layout to your Windows 10 environment, we discussed the options around Full (mandatory) Start Layouts, and Partial (flexible) Start Layouts, and where these may fit in your environment.
In this post we will look at the options and processes to address the scenario where you need to change these Layouts after initial deployment, be it due to software changes or additional configuration changes that may be required.
Often, it is a nice and easy process at the beginning of a project, to build the perfect environment according to “now,” especially when the Citrix administrator is the only “user” of this environment. However, eventually users come along and access it, changes are requested, new applications are procured, and you find yourself in a situation where your pristine environment has morphed into a living, undulating beast that you now have to manage
We will outline two scenarios below:
- Addition of Applications to your base image and the need to add these to an existing Start Layout
- Removal of Applications from your base image, and the behaviours associated with this process
Updating Apps and Layouts – application additions and changes:
After deploying Start Layouts, you may decide to update your environment with some additional applications, some of these which require being pinned to the Start Menu for the userbase. The below example will outline the process of updating or altering an existing defined Layout, ideally providing a smooth transition, retaining all the existing Start Layout configuration completed to date.
In the following example, there is an updated base image which contains three new applications:
- Notepad ++
- KeePass
- Adobe Reader
The goal is to add these new applications to an existing Start Layout. There are two methods available at this point.
- Repeat the same process outlined in the first blog post, and create a brand new Start Layout XML file
- Manually alter the existing Layout file and make manual adjustments based on the content (apps) that have been added to the image.
This walk-through is going to focus on method 1 above, as It is less complex for the average admin, and uses a process that, by now, is probably familiar after reading the first post in this series.
Let’s get started:
To begin, either remove any policies applying a CustomStartLayout.xml file to the image or log in with a account not affected by this policy (if you follow the first post in this series, there may be an account unaffected by policies already).
I would suggest, at this point, that it is a far better practice to not remove the policy that is applying to the production user base, as any change may introduce concern or calls to the support desk. It is much cleaner to utilise the filtering methodology discussed in our first post, ensuring that the user account used to build the Start Layouts, is not affected by the production policy. Best of both worlds – safety and flexibility
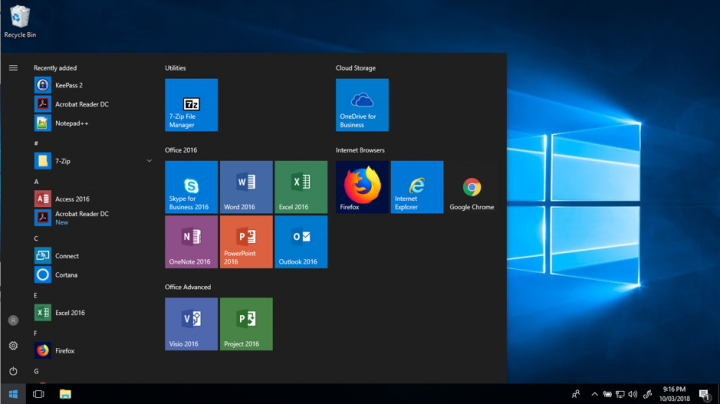
NOTE: if you remove or disable the policy that is applying the current Start Layout, existing Start Menu Layouts will stay in place, but they will no longer show as “locked” if using partial layouts. The image below shows this behaviour. The user logged in to this image is denied “Apply” on the Policy Mandating a Start Layout, and is the same user used to create the initial Start Layout
Note that the Start Menu is now unlocked again, allowing for changes based on the initial Start Layout
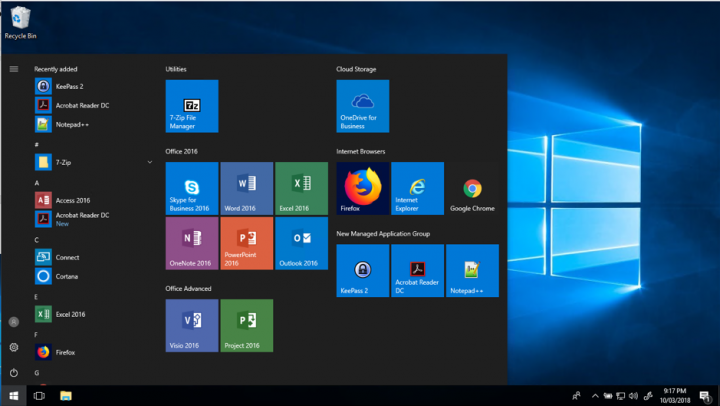
In the below screenshot, I have created a new Start Menu Group called “New Managed Application Group” and I have pinned three new applications to it: KeePass, Adobe Reader DC and Notepad ++
From here, it’s a repeat of the initial export process from the first post. It makes sense to export the Custom Layout to a differentfile each time for version control capability. This allows for quick rollback as required
Export-StartLayout -Path \\Server\Share\CustomStart2.xml
Now, Edit the XML to apply a Partial Start Layout if you desire
From: <DefaultLayoutOverride>
To: <DefaultLayoutOverride LayoutCustomizationRestrictionType=”OnlySpecifiedGroups”>
Updating the existing Policy with the updated Start Menu XML file created, will now apply the updated Start Layout to users at the next login.
In the image below, the managed groupsare locked again indicating a Partial Start Layout has been applied and the new managed group shows up. Also note that personal customised groups are retained — this is important for user groups that have added their own Groups in a Partial Start Layout scenario.

Updating Apps and Layouts – application removals or changes:
The addition of applications to a base image is a common occurrence in VDI environments. There is also the scenario where you may physically need to remove applications from the image, which you have been configuring via Start Layouts.
In the example below, three applications have been removed from the image
- KeePass
- Adobe Reader
- 7zip
There are a couple of behaviours to note in this scenario
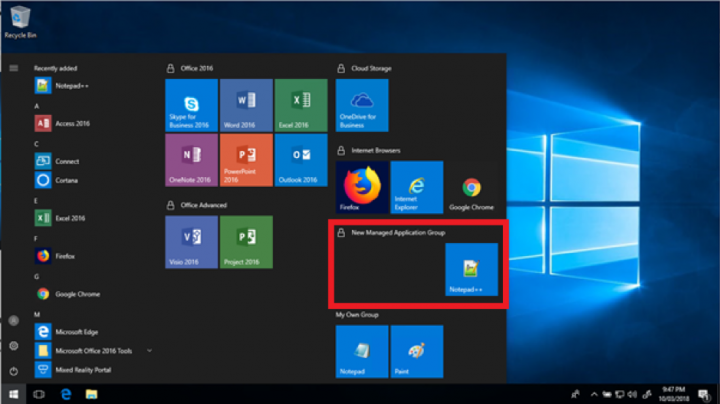
If a single application is removed from an image, and this application has been added to a custom group within your Start Layout (for this example, lets focus on the “New Managed Application Group” below) the Start Menu will simply remove the application shortcuts that are no longer accessible, in this case, KeePass and Adobe Reader.
If you remove all applications from an existing group, the Start Menu will remove the group entirely.
Note in the same example below, 7zip existed in a group called “Utilities” and has been removed from the image. Next time the user with the Start Layout applied to them logs into the updated image, the “Utilities” Group will simply be removed entirely
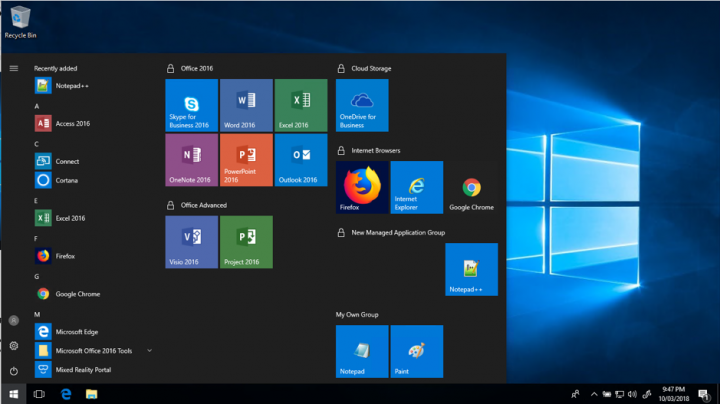
Importantly, if the end user logs into an image that has the applications that you initially defined accessible again (in this example 7zip), then the Start Menu will honour the application shortcuts, however it will create a new “unmanaged” group without a name and users will be able to customise it as below:

It is important to keep this behaviour in mind when you deal with multiple images and controlling Start Layouts to avoid confusing your user base as much as possible. You may well find the certain scenarios may mandate the use of multiple layout policies to address your varied image requirements.
Alternatively, you may well decide to standardise your processes, and in either an “addition” or “removal” scenario, create a new custom Layout each time. This is the most controlled way of operating and managing your environment, however it is important to understand the behaviour if you choose an alternate approach.
Additional Considerations Around Start Menu Layouts
There are many methods of optimising or controlling base images, some of these techniques may directly fight with what you are trying to achieve with a Custom Start Layout, some examples and considerations around these are noted below:
- The configuration of “Hide Common Programs” via Policy or Registry Key, will conflict with pre-defined Start Layouts. The “all users” profile is the default location for shortcuts to be sourced from within a Custom Layout. If you remove access to this location, the Start Menu cannot be populated
- Always ensure that items being pinned to the Start Menu have a corresponding shortcut in a Supported location if you want to export and import an existing Start Layout. Ensure that users have access to this location
- Anytime you are making changes to the environment, and you are not 100% sure what the impact will be on end users, ensure that you test these changes before you apply them to the production environment.
This concludes the series on customising and managing Windows 10 Start Menu’s with an aim to provide you increased control and flexibility when dealing with the new world of Windows Start Menu’s. The management of these Layouts can be a form of art at times, and the more complex your environment, the more factors there are to consider, however given the flexibility of Group Policy, almost any scenario is addressable once you understand the process
Hopefully the processes outlined in this series will assist with understanding what tools are available to you and your teams, as well as when to use them and how they fit together in the Enterprise Space.
 Today’s post was written by James Kindon, a consultant focusing on Citrix- and Microsoft-based EUC technologies in Australia. Family man in awe of the community and those that contribute.
Follow James on Twitter and connect with him on LinkedIn.
Citrix TechBytes – Created by Citrix Experts, made for Citrix Technologists! Learn from passionate Citrix Experts and gain technical insights into the latest Citrix Technologies.
Click here for more TechBytes and subscribe.
Want specific TechBytes? Let us know! tech-content-feedback@citrix.com