We’ve seen a phenomenal interest in HDX 3D Pro for delivering rich graphics and CAD applications on XenApp and XenDesktop and uptake of technologies such as NVIDIA GRID vGPU. I’m increasingly being asked how to record great demos, one of our senior graphical experts in the UK HDX team, Andrew Woodard, kindly agreed to write this blog about his experiences doing this for performance analysis and demo. Thanks Andy!
Introduction:
Recent trends in computer entertainment – especially in the areas of home digital video production, and recording of console gameplay, have provided some low cost and high quality options for capturing demo videos of HDX sessions.
Historically we may have used software solutions for this, such as “FRAPS”, “SnagIt” or “Camtasia”. In non-performance critical situations these can indeed be viable options and should not be discounted. Those types of solutions are great for how-to-videos and recorded set-up guides.
If you really want to record the true performance of the graphics delivered though you should consider hardware capture. When you instead use a dedicated hardware capture solution the endpoint displaying the session is not in any way encumbered or affected. Similarly, you can now perform capture from any device (thin client, tablet, laptop or desktop pc) so long as the device presents a video output compatible with your capture hardware.
Consumer Capture Hardware:
Disclaimer: There are plenty of equivalent devices on the market and these are not an official endorsement by Citrix, rather these are a couple of examples that we’ve had some experience with. In general these devices tend to be in the $150 to $200 price bracket and are readily available through on-line electronics retailers. Those mentioned just happen to be those available in one of our HDX test labs.
As mentioned, there are two main trends in consumer video capture hardware – home video editing/production and “gameplay” capture.
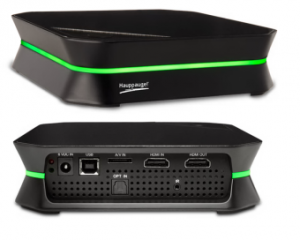
An example Gameplay capture device, as used by the UK HDX team in capturing demo videos is the “Hauppage HD PVR 2 Gaming Edition Plus.”
This device requires a USB2 connection to a PC will actually store the recorded video. The device has a hardware H264 encoder on it, so the captured video will be compressed, however this also means that any reasonable spec PC/MAC will be able to act as a capture platform.
An example Video edit device, that has been used by the UK HDX team in capturing demo videos is the “Black Magic Intensity Shuttle.”
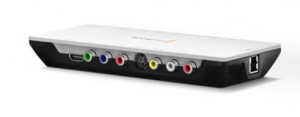
This device, being designed for video production performs lossless capture. However with the datarate that lossless video generates, USB3.0 or Thunderbolt is required to connect to a fast (core i7) capture PC/MAC which will also require a fast and large enough disk system to store the vast volume of data that is generated during capture.
The general advice would be that for any videos that are going to be compressed anyway for use on Citrix TV, YouTube or viewing over the internet, a compressed capture device like the Hauppauge is probably good enough.
Capturing from HDMI, DVI, DisplayPort and HDCP:
Consumer video capture platforms are designed to work first and foremost with HDMI connections (High Definition Media Interconnect). In general, with the correct cable, Devices that offer DVI or Displayport (or the mini variants) can be connected simply by getting the right adapter cable from your favourite electronics store.
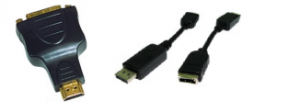
There are a few potential “gotcha’s” here to be aware of:
1) HDCP – High-bandwidth Digital Content Protection. This is a copy protection scheme designed to prevent home users from intercepting copyright material, such as Blu-ray playback, from an HDMI link in order to produce a perfect digital copy. In 99% of the scenarios that we operate in, HDCP does not present a problem, as HDCP tends to be turned on only when it is in use. For example if you were capturing the output from a PS4 or XBoxOne– this would be allowed while looking at the home screen, or playing a game, but would not be possible as soon as a Blu-ray disc was inserted and started to play-back. In general there are some consumer devices that are aimed at consumer media where HDCP may be permanently enabled – for example we have seen some early android tablets from ~2012 permanently enable HDCP on their HDMI output ports. In general you’ll need to check your device. Similarly a device like an AppleTV should be expected to have HDCP permanently enabled. However a laptop PC is unlikely to negotiate HDCP on an output unless a DVD or Blu-ray playback program is launched.
2) Display resolution. Consumer capture hardware is not designed to capture the output from arbitrary screen resolutions. Specifically, all of these hardware devices will be expecting a consumer television resolution signal. Typically, you should expect to be capturing video at 720p, 1080i or 1080p HDTV output resolutions and refresh rates. Obviously this means that the device you are capturing from must support those resolutions.
3) Through-negotiation. Leading on from the issue of display resolution, as you’ll see shortly, when we connect a device to our HDMI capture rig the device will also be connected to a “monitor” display. Since the negotiation of supported resolutions will be passed through to the “monitor” display this needs to be a High Definition Television, not a traditional computer monitor. In general our experience has shown that going for a small low-cost “main-brand” television, LG, JVC, Samsung, Sony etc. is generally likely to give a good result. As part of the display negotiation the monitor will provide “EDID” information to the device you are attempting to capture output from. If the device is unable to correctly parse the EDID information then you may not successfully negotiate a suitable display resolution, and hence be unable to capture. So the bottom line here – get a low-cost, but mainstream, 1080p capable HD TV to be part of your capture rig.
4) Android Displays and Mirroring. When using some android devices, especially older or lower powered tablets, the device may use a technique called “mirroring” to display graphics output on an external HDMI connected display. In this scenario there may well be a performance hit, as some display mirroring implementations perform a full-screen copy of the output on the tablet screen to the HDMI screen – and copying in this way can be very resource intensive on ARM processors.
Connecting up and capturing
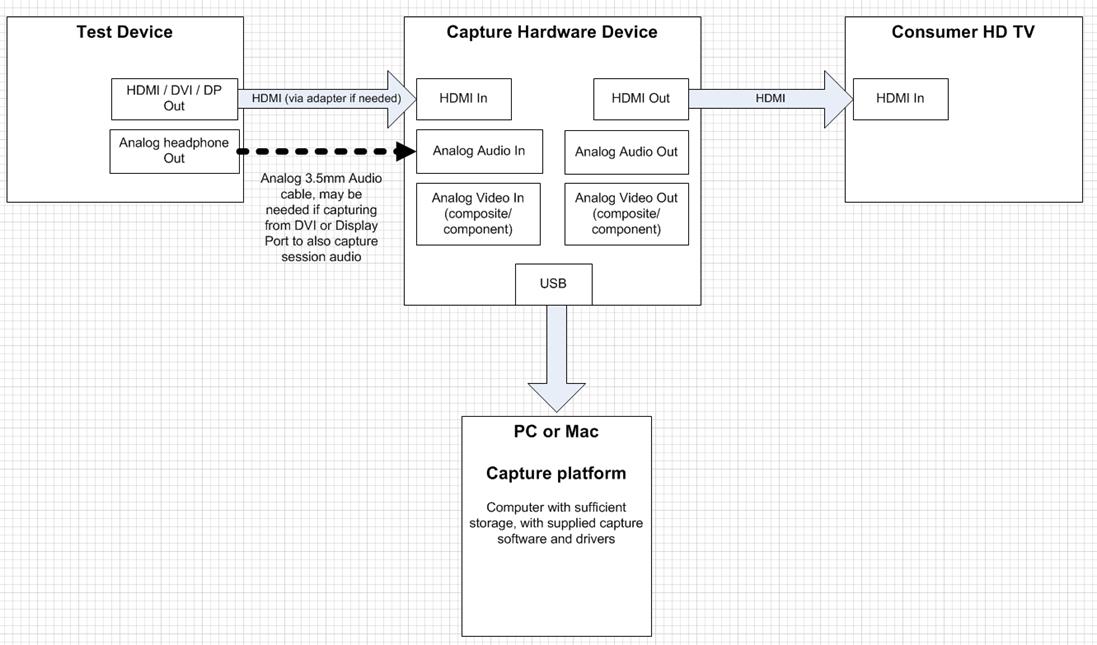
Generally whatever hardware capture solution you end up with you’ll be connecting up for capture like this:
- The Display output from the test device, via any adapters needed, will be connected to the “HDMI In” on the capture device.
- If the device you are capturing from doesn’t put out audio over the connection hooked up through HDMI, almost all capture devices have the ability to also connect some form of stereo audio input that you will be able to link to a headphone or speaker out.
- The “HDMI Out” on the capture device will be hooked up to your consumer TV.
- Lastly, whatever the capture hardware uses for communication with a host/capture machine for actually storing digital video, be it USB2, USB3 or Thunderbolt.
Some Hints and Tips:
It’s unlikely you’ll get a complete a complete capture of everything you want to show in one take. Similarly you’re probably going to want to add titles, drop-in inserts and slides. For our internal people, creative services can help and/or advise. Similarly there are plenty of consumer video editing packages available or less than $100 which have more than enough power to allow you to edit and assemble your captured footage, adding in anything you need ready to “render-down” to a video that can be uploaded to your desired video platform. There are plenty of packages out there. We’ve had good experiences of “Sony Movie Studio” but there are plenty of equivalent offerings from Magix, Pinnacle, and for those who are more serious (and have budget), Adobe.
An easy tip for assembling footage and adhering to corporate branding guidance, is to use corporate banded PowerPoint templates for introduction, and any insert slides in between video segments. You can then use the capture hardware with a laptop or PC connected in place of your demo device to capture your PowerPoint slides as video. Then using which ever video edit software you have settled on, you can insert those slides, slow them down, cut them short – cut back and forth between your captured video and slides explaining what’s going on, add a voice-over – whatever you need to get the message across.
One last and VERY important point: COPYRIGHT.
Whenever working with video, always be mindful of the copyright terms and conditions of anything you are capturing. Especially so for any content – for example a movie trailer – that you may be showing as part of your video capture. If you are demonstrating software running in an HDX session make sure we are appropriately licensed to show that software publicly. Also, if you want to add music to your video you can’t just add your favourite playlist to the video track. Your company becomes responsible for the redistribution and public performance of any copyrighted material, infringement of which can result in fines, lawsuits or worse. Always contact the appropriate legal expert in your company (e.g. in Citrix our “Creative Services” team) for guidance if you want or need to include music in your video presentations.
If all this sounds a bit of overkill for your needs, one of the easiest ways you can record a graphical demo without impacting on the performance is by using a standalone camera or camera-phone pointing at the screen 😉

