


Deploying Citrix Virtual Apps and Desktops in AWS Nitro-based regions
Thinking of deploying Citrix Virtual Apps and Desktops in AWS GovCloud East or a new Nitro-based region? Here’s what you need to know to make your Citrix deployment a success.
With the rise of the microservices, we have seen many technologies broken down into key components to become sleeker and more efficient. AWS has done just that with their new Nitro system, separating out the capabilities of the traditional hypervisor for added security and cost savings. For a deep dive into the Nitro system, check out Anthony Liguori’s video from AWS re:Invent 2018.
In this blog post, I’ll lay out the lessons learned from AWS GovCloud East, which hold true for all new Nitro-based regions and AWS Outposts. AWS GovCloud East is a newer AWS region that uses the Nitro system almost exclusively. This means that all those great new instance types are available (among many other new optimizations and features) and that the older, non-Nitro-based instance types are NOT available.
Before we get down into the weeds, let’s consider the following:
- GovCloud East requires all software/appliances/images to be Elastic Network Adapter (ENA) compatible. Citrix ADC VPX 13.0 is the only version of Citrix ADC that has this feature, so it is currently the only supported ADC offering in the GovCloud East Marketplace. If you plan to deploy or currently have a Citrix ADC in GovCloud West that you wish to pair with one in GovCloud East, it will need to be version 13.0, as well.
- If you currently have a Citrix Virtual Apps and Desktops deployment in GovCloud West, the leading practice would be to upgrade your instance types for Citrix infrastructure servers and VDA instances to have parity across East and West deployments. This is generally not a big deal, but be sure to check the compatibility beforehand, read the documentation, and back up all instances before making changes.
- EBS volumes on Nitro-based instances are exposed as Non-Volatile Memory Express (NVMe). To utilize these block devices, you must have the AWS NVMe drivers installed on the instance. This should be considered when changing the instance type and if you are not using the latest AWS Windows or Linux AMIs for your VDA instances. If you use the VM Import tool to upload an image from another location (on-prem data center, etc.), you will need to install the correct drivers on the image to use Nitro-based instance types.
Now, on to the fun stuff!
In addition to the above considerations, there are a few things to do to accommodate this new region so that Citrix Machine Creation Services (MCS) can perform image and power management. If you haven’t already, check out my last blog for more detailed instructions on a few of these items!
When choosing the instance types for your VDAs, the available selection during machine catalog creation does not include the latest instance types. This can be fixed by simply replacing a file on the delivery controller. This Citrix Files link is the latest InstanceTypes.xml at the time of this writing. Replace the existing InstanceTypes.xml file in C:\ProgramFiles\Common Files\Citrix\HCLPlugins\Hypervisor\2.27.0.0\AWS\AWS Configuration\InstanceTypes.xml with the new one. Always rename older files rather than overwriting them, just in case. For further information on this fix, or to make your own InstanceTypes.xml file, see CTX139707. (Please note, this file may be overwritten upon upgrade of the Citrix Virtual Apps and Desktops software.)
The volume worker for MCS defaults to a non-Nitro instance type. We can manually set this value in the Advanced Configurations tab of the host connection by typing the following:
VolumeWorkerInstanceType=m5.large
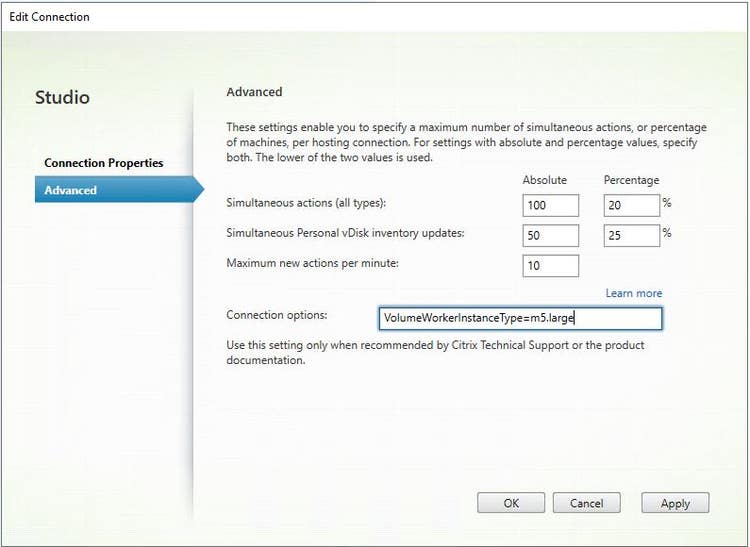
If you are using the explicit VPC rather than the default VPC for your AWS deployment, the string would look like this (comma separated, no spaces):
UseExplicitVpcForVolumeWorkerBootstrap=true,VolumeWorkerInstanceType=m5.large
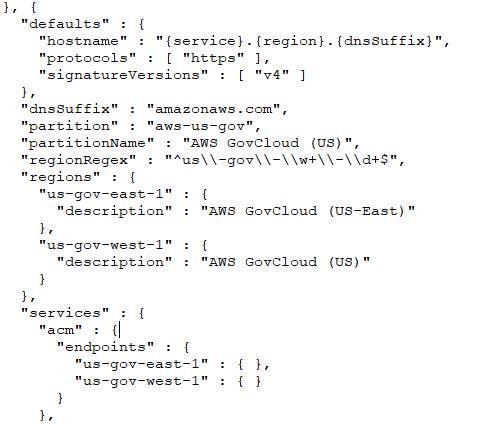
The .NET SDK for AWS did not include the GovCloud East region at the time of the Citrix Virtual Apps and Desktops release. By default, the Delivery Controller will not be aware of this region when creating a Host Connection or resources. Download the latest endpoints.json from GitHub and replace the existing (or add in newly) in C:\Program Files\Common Files\Citrix\HCLPlugins\Hypervisor\2.27.0.0\AWS.
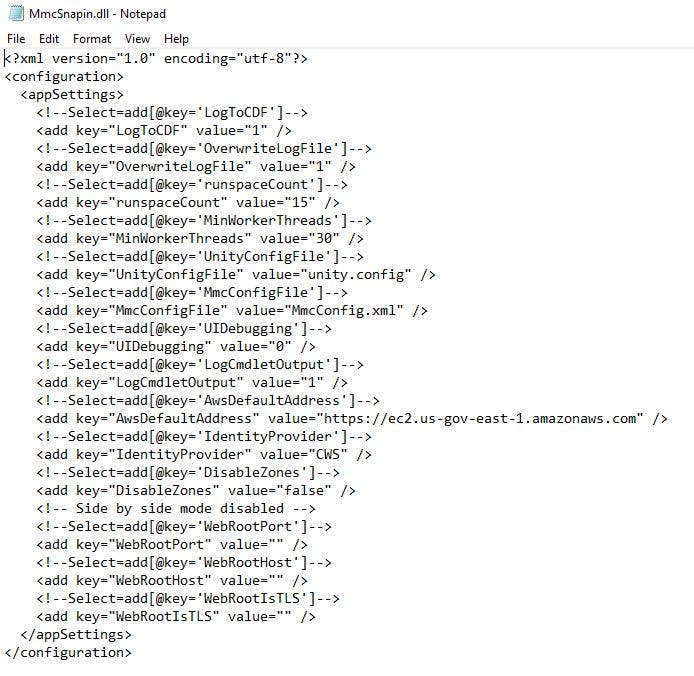
When choosing “AWS” as the platform for your Host Connection, the endpoint URL for us-east-1 is listed as the default in the mmcsnapin.dll.config file. This must be changed to direct the Host Connection to the correct location, us-gov-east-1. Change the mmcsnapin.dll.config to ec2.us-gov-east-1.amazonaws.com here: C:\Program Files\Citrix\Desktop Studio\mmcsnapin.dll.config. (Please note, this file may be overwritten upon upgrade of the Citrix Virtual Apps and Desktops software.)
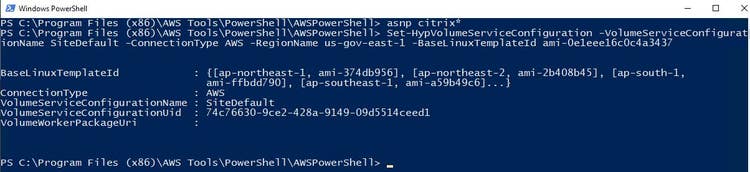
Due to the change in EBS volumes to the new NVMe type, the drive mappings must be changed on the volume worker. For simplicity, we have created a public AMI (ami-0e1eee16c0c4a3437) in GovCloud East that can be used for your volume worker by setting the Base Linux Template in PoSh on the Delivery Controller. (Please note, this AMI is only available in GovCloud East.)
<code>HypVolumeServiceConfiguration -VolumeServiceConfigurationName SiteDefault -ConnectionType AWS -RegionName us-gov-east-1 -BaseLinuxTemplateId ami-0e1eee16c0c4a3437
If you would like to make your own Base Linux Template, it requires only a bit of Linux knowledge (or just follow along here). Choose an Amazon Linux AMI that is EBS-backed from the AWS GovCloud East Marketplace (or any new region) and launch it. Log in to the instance with PuTTY using the public IP address and your AWS private key that the instance was made with, in .ppk format.
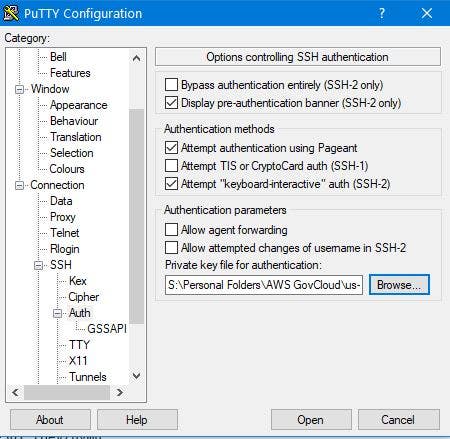
At the key prompt, click the “Yes” button. When the CLI comes up, enter the username as “ec2-user”, and you’re in!We need to modify the rc.local file with the new drive mappings for NVMe block storage by creating symbolic links at boot:
sudo vi /etc/rc.d/rc.local
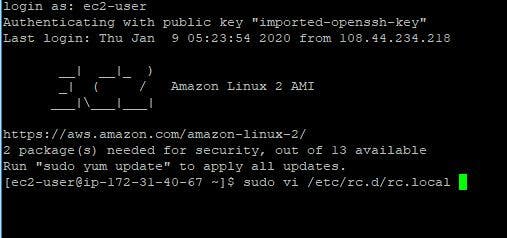
Click “I” to edit the file. Use the d-pad or down arrow key to move down past the “touch /var/lock/subsys/local” line and add the following:
ln -snf /dev/nvme1n1 /dev/nvmf
ln -snf /dev/nvme1n1p1 /dev/nvmf1
ln -snf /dev/nvme2n1 /dev/nvmg
ln -snf /dev/nvme2n1p1 /dev/nvmg1
ln -snf /dev/nvme3n1 /dev/nvmh
ln -snf /dev/nvme3n1p1 /dev/nvmh1
ln -snf /dev/nvme4n1 /dev/nvmi
ln -snf /dev/nvme4n1p1 /dev/nvmi1
ln -snf /dev/nvme5n1 /dev/nvmj
ln -snf /dev/nvme5n1p1 /dev/nvmj1
ln -snf /dev/nvme6n1 /dev/nvmk
ln -snf /dev/nvme6n1p1 /dev/nvmk
ln -snf /dev/nvme7n1 /dev/nvml
ln -snf /dev/nvme7n1p1 /dev/nvml
ln -snf /dev/nvme8n1 /dev/nvmm
ln -snf /dev/nvme8n1p1 /dev/nvmm1
ln -snf /dev/nvme9n1 /dev/nvmn
ln -snf /dev/nvme9n1p1 /dev/nvmn1
ln -snf /dev/nvme10n1 /dev/nvmo
ln -snf /dev/nvme10n1p1 /dev/nvmo1
ln -snf /dev/nvme11n1 /dev/nvmp
ln -snf /dev/nvme11n1p1 /dev/nvmp1
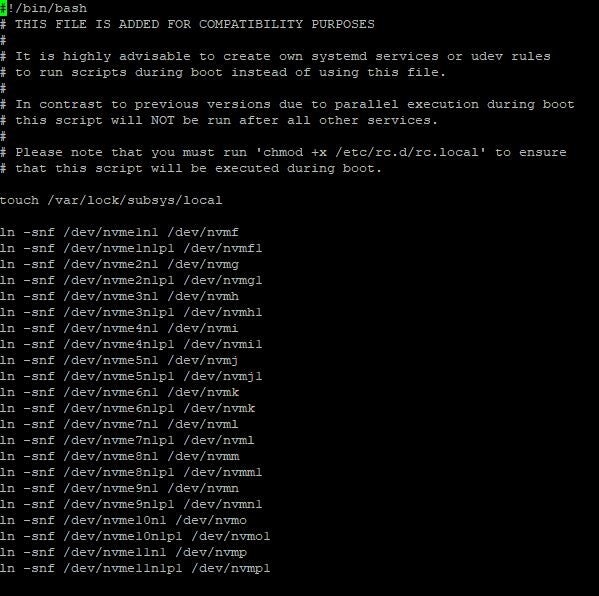
Once you have entered the requisite text, press “Escape” and the type “:wq!” (no quotes) and “Enter”.
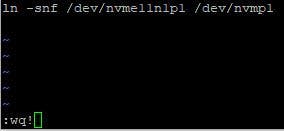
Once you’ve exited vi, change the permissions on this file to ensure that it will run at boot:
sudo chmod +x /etc/rc.d/rc.local
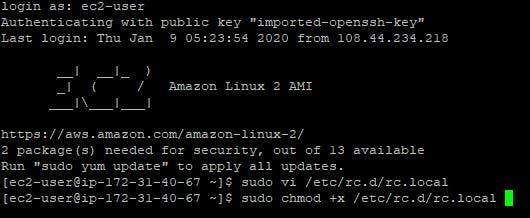
Reboot the machine and ensure that these changes have persisted (just do the vi command again once the machine comes back up). Power down the instance and create an AMI from it. Then simply substitute your new AMI ID for the one above and run the PoSh command on the delivery controller. Et voilà! Now you’re ready to rock the GovCloud!
Special thanks to Wesley Joyce from AWS for the symbolic link fix for the volume worker drive mappings!!
Stay tuned for more tips and tricks, coming soon!
Citrix Tech Bytes – Created by Citrix Experts, made for Citrix Technologists! Learn from passionate Citrix Experts and gain technical insights into the latest Citrix Technologies.
Click here for more Tech Bytes and subscribe.
Want specific Tech Bytes? Let us know! tech-content-feedback@citrix.com.
